
高機能なゲームエンジンであるUnreal Engineは無料で簡単に始めることができます。
インストールの仕方などは以前の記事をどうぞ。
前回の続きで、First PersonのBPを学びました。
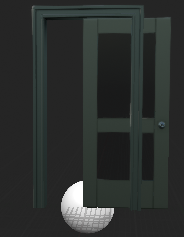
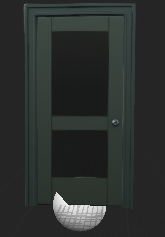
近づくと開き、遠ざかると閉じるドアを作りました。
参考動画
ゲームデザイナーのためのブループリントとゲームプレイ>親クラスのドアの作成、オーバーラップで開く
1.Googleで検索する。そして画像の手順にすすめる。
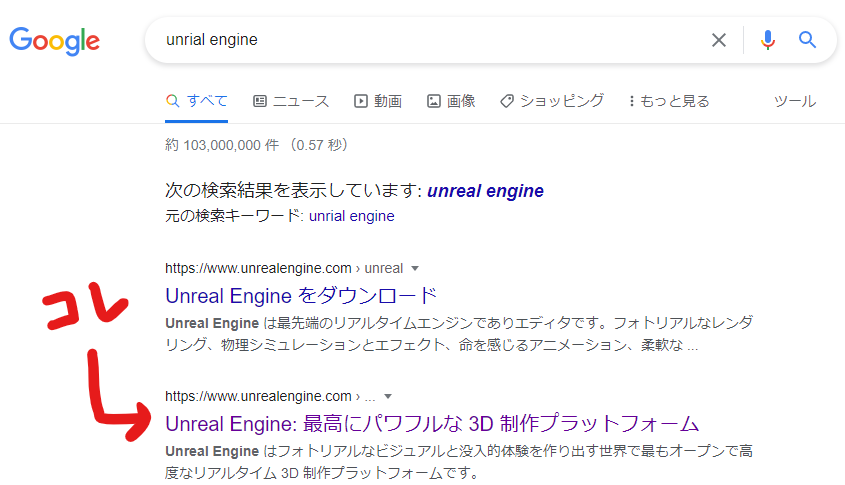
↓
↓
↓
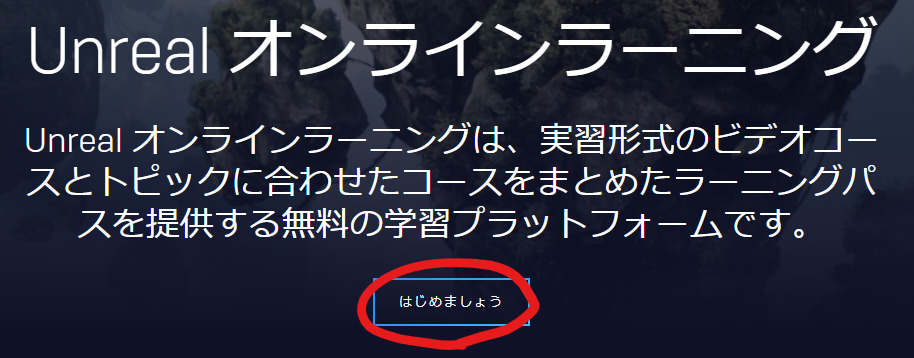
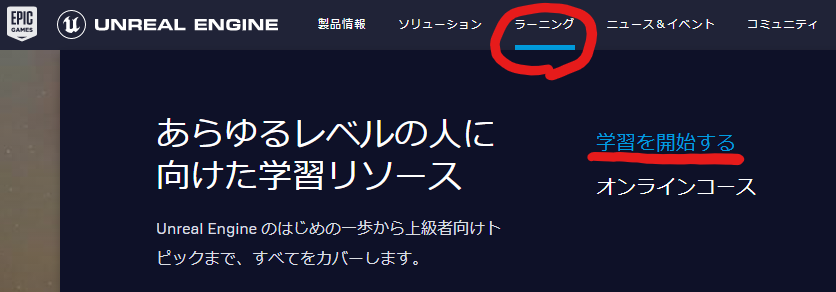
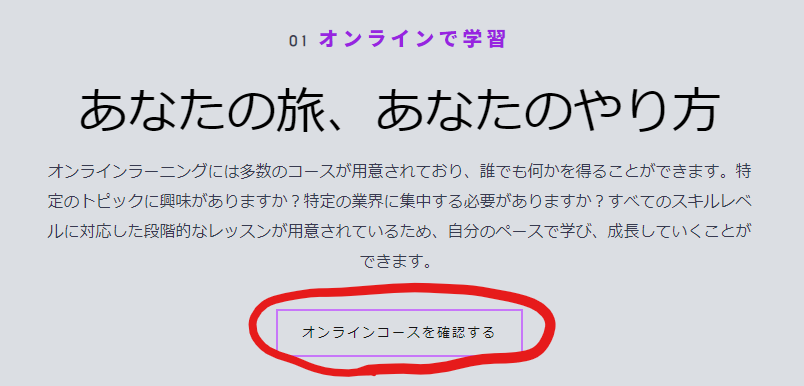
2.左のウィジェットからコンテンツライブラリを選ぶ。
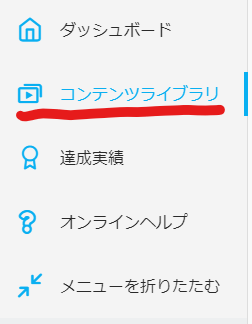
3.中央にある検索窓から見たい動画を検索。

4.動画を見る。
今回はEpicから配布されている[Blueprints and Gameplay In Development]というプロジェクトを使って学習しています。
1.Unreal engineのサイトのトップバーから、PERSONALを選ぶ。
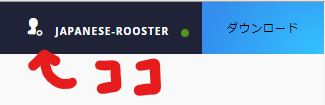
(まずサイト右上のIDにカーソルを合わせる)
↓

(PERSONALを選ぶ)
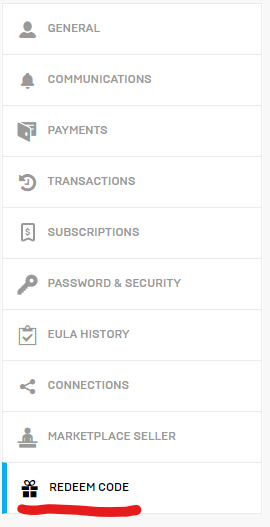
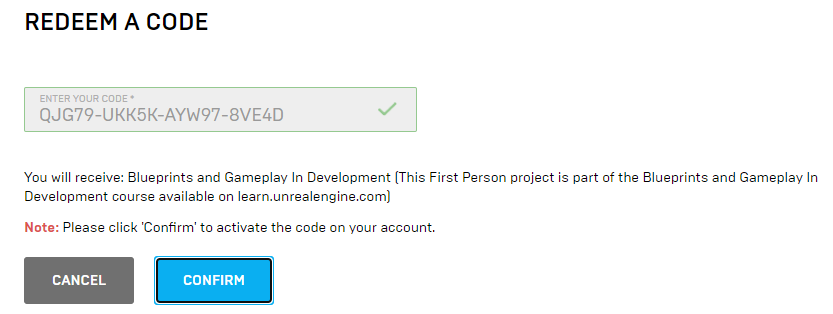
2.REDEEM CODE(コードの利用)を選ぶ。
3.次のコードを入力して、REDEEM(コードを利用)をクリック。
QJG79-UKK5K-AYW97-8VE4D
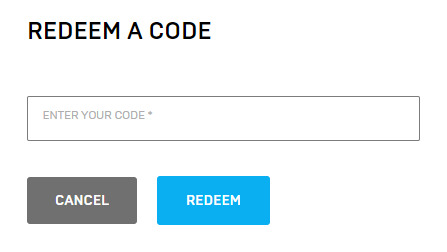
4.COMFIRM(確認)をクリック。
学習内容

知識
発音
ɪnt`ɚːpəléɪʃən(米国英語), ˌɪˈtɜ:pʌˌleɪʃʌn(英国英語)
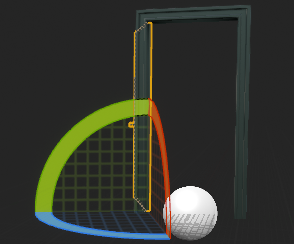
意味:補間、内挿
(区間の関数を決めること。)

↓

意味:線形補間(Linear Interpolateの略)
↓
ブループリント(BP)
場所:UE4エディタのコンテンツブラウザ
手順・注意点
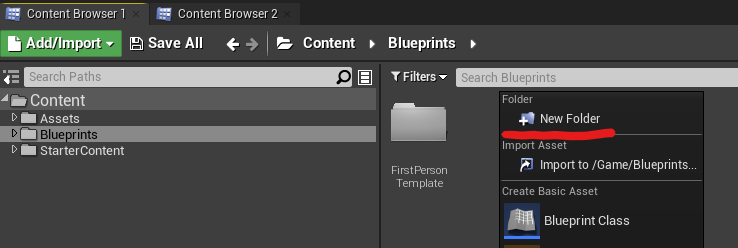
1.[Blueprints]フォルダを開く。右クリックして[New Folder]を選択して新しいフォルダを作る。名前は[Doors]にする。
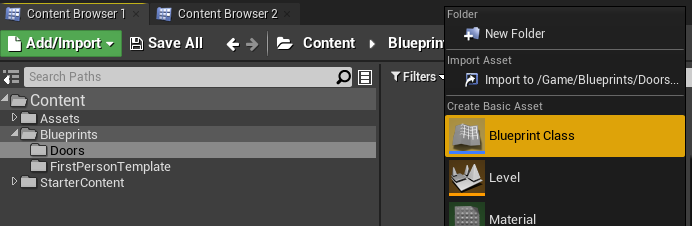
2.[Doors]のフォルダの中で右クリックして[Blueprint Class]>[Actor]を選びBPをつくる。名前は[BP_Door_parent]とする。
↓

場所:BP_Door_ParentのViewport

手順・注意点
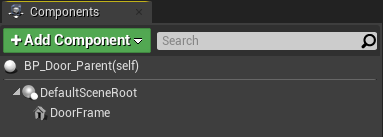
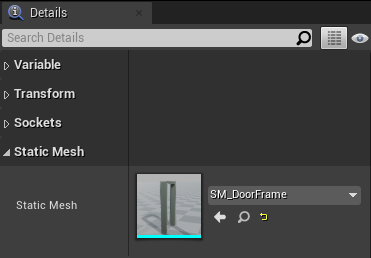
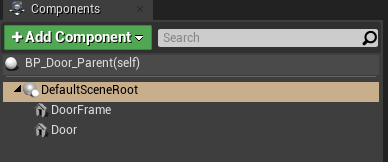
1.[Add Component]>[Static Mesh] を選び、名前は[DoorFrame]とする。
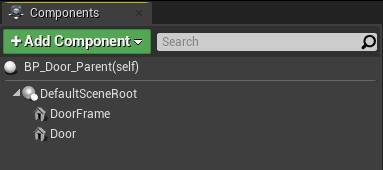
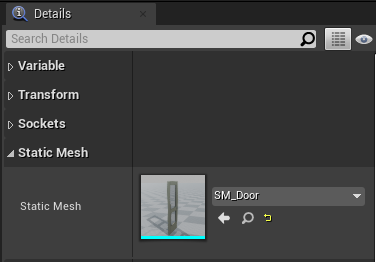
2.[DoorFrame]を複製する。名前は[Door]にする。
3.[DoorFrame]、[Door]の[Static Mesh]を、それぞれ[SM_DoorFrame]、[SM_Door]にする。
4.ドアを動かして閉める。
↓
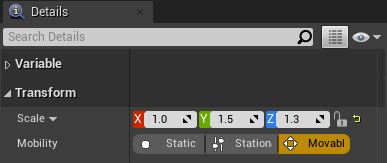
5.[Default Scene Root]を選択した状態で、大きさ(Scale)の調整(X:1.0 Y:1.5 Z:1.3)をする。
↓
場所:BP_Door_ParentのEvent Graph
手順・注意点
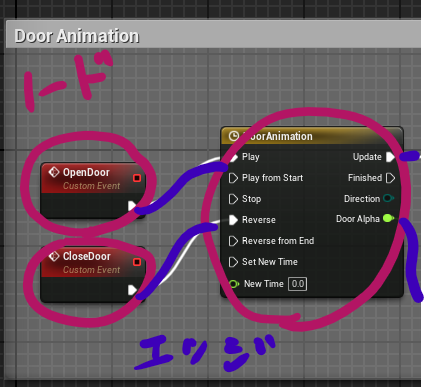
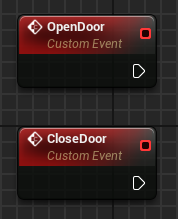
カスタムイベントを2つ作成(右クリックして[Add Custom Event])する。名前は[OpenDoor]、[CloseDoor]とする。
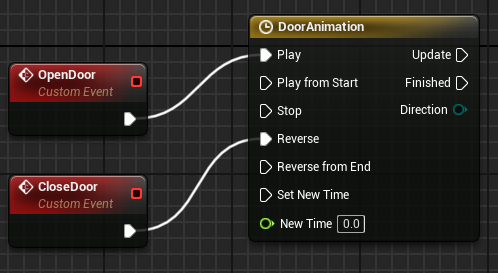
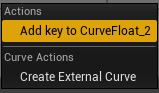
タイムラインを作成(右クリックして[Add Timeline])する。名前は[DoorAnimation]とする。[Play]は[OpenDoor]に、[Reverse]は[CloseDoor]につなげる。
タイムラインのノードをダブルクリックして、タイムラインの編集をする。まず、[Length]の値を[0.75]にする。

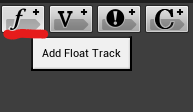
[Add Float Track]をクリックする。
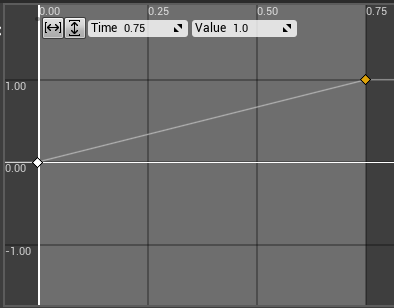
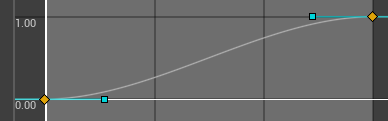
タイムライン上に2つのキーを作成(右クリックして[Add key to …])して、座標を設定(Time 0,Value 0とTime 0.75, Value 1.0)する。
↓
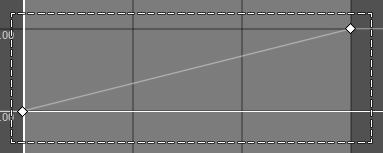
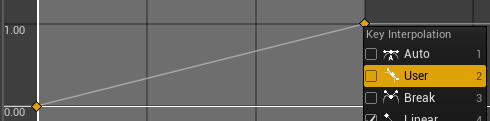
両方のキーを選択して、キーを右クリック。[Key Interpolation]で[User]を選ぶ。
↓
↓
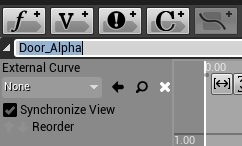
キートラックの名前を変更(選択してF2)する。名前は[Door_Alpha]とする。
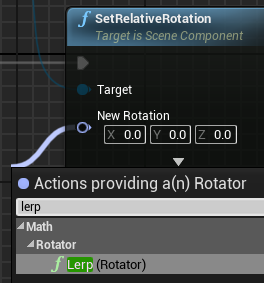
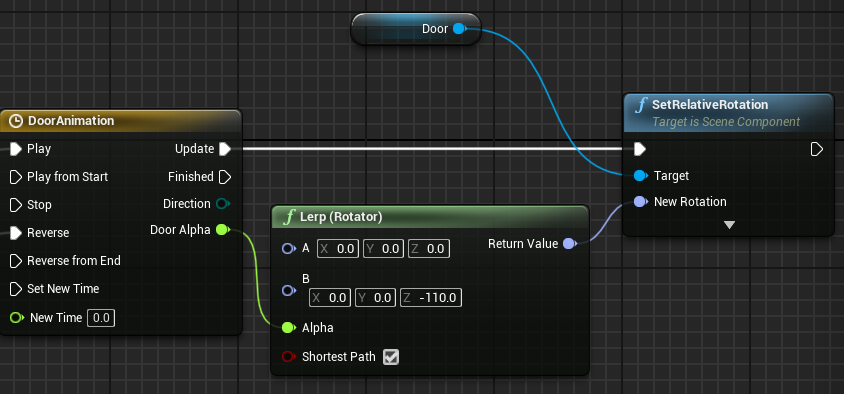
[Door]をゲットした後、[SetRelativeRotation]をセットして、[DoorAnimation]の[Update]とつなぐ。

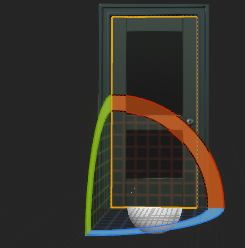
RotationをA(x:0,y:0,z:0) B (x:0,y:0,z:-110) と設定して、Shortest Pathにチェックを入れる。
↓
場所:UE4のエディタのコンテンツブラウザ
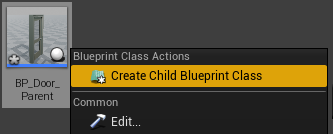
[BP_Door_Parent]を右クリックして子BPの作成([Create Child Blueprint Class]を選ぶ)をする。名前は[BPC_Door_Overlap]とする。
(多分BPCはBlueprint Childの略)
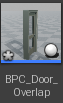
場所:BPC_Door_Overlap
手順・注意点
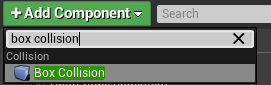
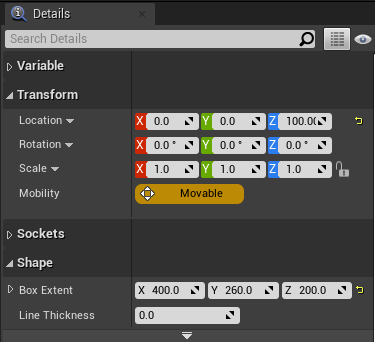
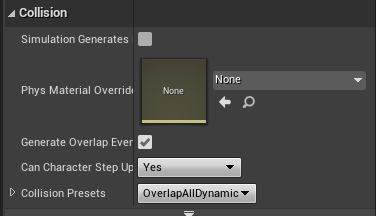
1.[Box Collision]のコンポーネントを追加する。名前は[Box]のままで大丈夫。
2.[Box]を選択した状態で、Detailsパネルの設定を下の画像のようにする。
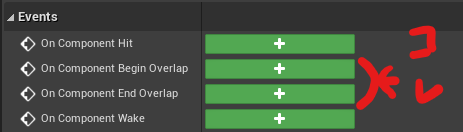
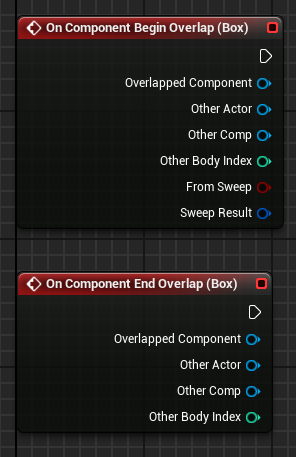
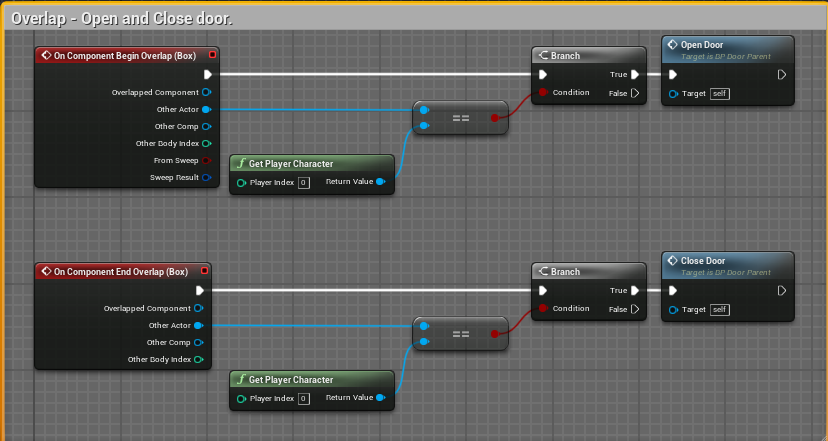
3.Detalsパネルの[Events]で、[On Component Begin Overlap]と[On Component End Overlap]の2つを選ぶ。[Event Graph]にノードが作成される。
(Detailsパネル)
↓
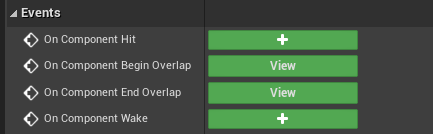
(Event Graph)
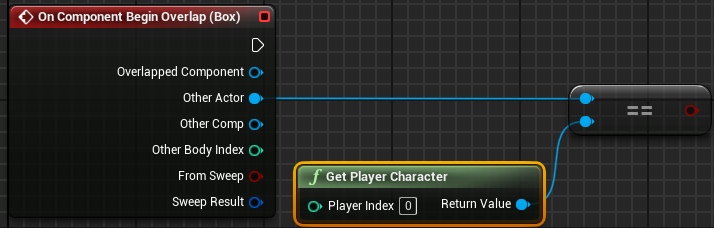
4.[On Component Begin Overlap]の[Other Actor]から[==]を出し、[Get Player Character]を作ってつなげる。
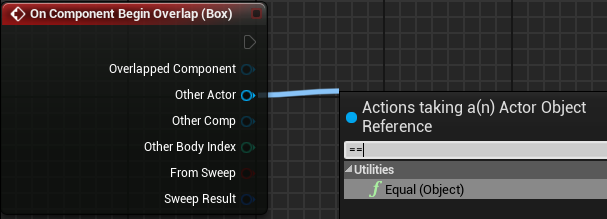
↓
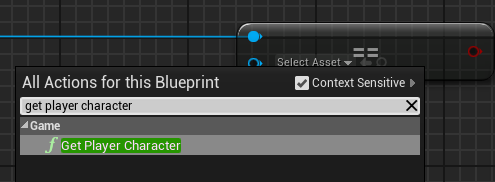
↓
5.[Branch]と[Open Door]を作ってつなげる。
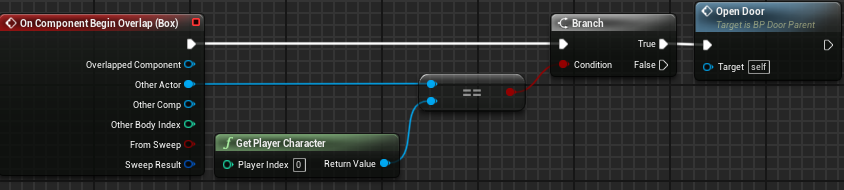
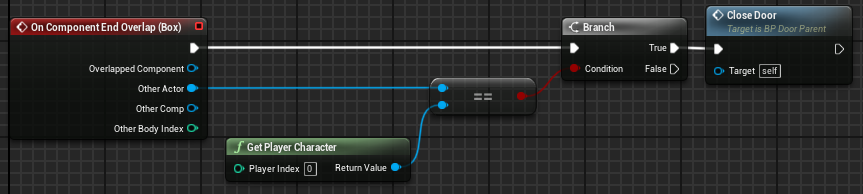
6.中の部分をコピペして、[On Component End Overlap]は[Close Door]とつなげる。
7.コメントの中に入れる。
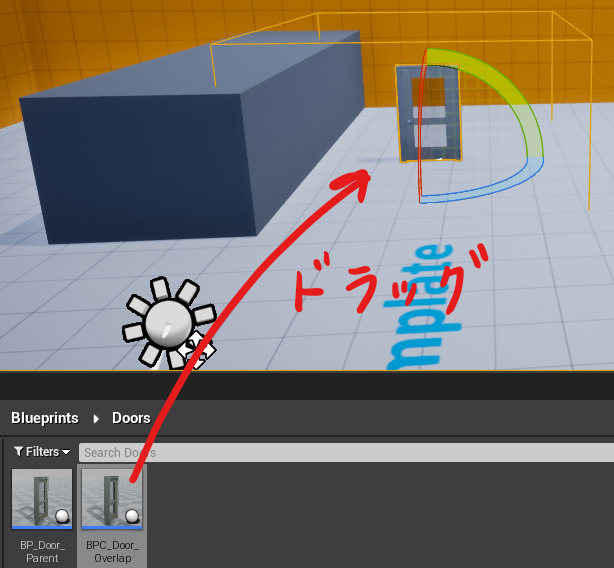
8.UE4のエディタに戻り、[BPC_Door_Overlap]をViewportにドラッグした後、プレイをしてドアの挙動を確かめる。
コメント