備忘録です。
説明をお求めの方は下記の本(サイト)がオススメです。
丁寧に解説してくれています。
さらに、無料で読めます。
👇この本で学ばせてもらっています。
UEのインストール方法やC++の導入の仕方から、丁寧に解説してくれています。
知識
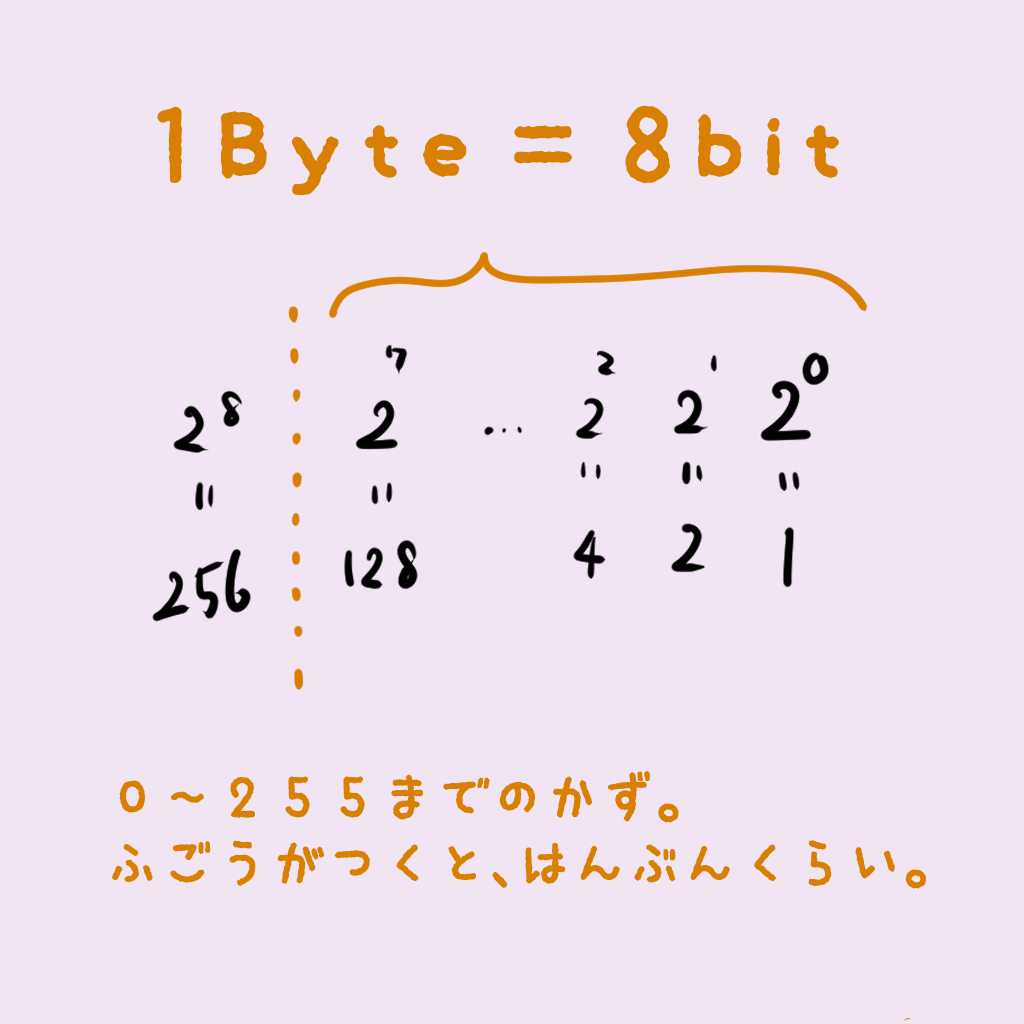
8bitで256個の数を表せる。
符号つけると1bit消費。
符号をつけたときに表せるのは、たぶん-128~127。0含めるから。
マイナスを使わないときは、変数の型のはじめにunsigned(符号なし)の[u]をつける。
uint32など。この32はbit数を表している。
コンパイルの前に処理を行うプログラム。
関連
#includeとか。
PHP
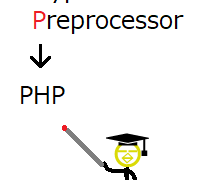
#includeの最後に置けって、エラーで怒られたやつ。
C plus plus
.cppはC++のソースファイル拡張子。
.hはヘッダーファイル。ヘッダファイル。ヘッダ。
UPROPERTY( )
👆のカッコの中身にいれるやつ。
EditAnywhere
編集できる。
VisibleAnywhere
編集できない。
などなど。
値の変更をできなくする。
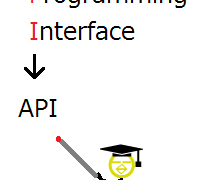
Application Programming Interface
発音:kízmet
意味:運命・宿命
printf()などで表示するときに使用する。
%d int
%f float
%c char(1文字)
%s char(文字列)
and: &&
or: ||
👇その他の演算子について
(条件) ? A : B
条件がtrueならA、条件がfalseならB。
発音ɪn(j)ùːməréɪʃən(米国英語)
意味列挙、数え上げること、一覧表
四則演算 four arithmetic operations
動詞、名詞、計算結果
add addition sum
subtract subtraction difference
multiply multiplication product
divide division quotient
👇詳しくはこちらで。

発音aɪˈdɛntʌˌfaɪɝ(米国英語)
意味識別子(ID)
エラーで良く出てくるやつ。undeclared identifier(宣言されていない識別子)。
変数が有効な範囲。
値渡し:引数と、関数の中での引数が、値が同じなだけの別物。関数の中で値を変更しても、関数の外での値は変更されていない。
参照渡し:引数と、関数の中での引数が、同じもの。関数の中で値を変更したら、関数の外での値も変更されている。
(参照渡しの方が軽いらしい。変数の値を変更されたくなかったら、引数の前にconstをつけておく。変更される場合エラーがでてくれる。)
StaticMeshComponent と StaticMesh は違う。
スキル
Ctrl + スペース
F12(ショートカット)
A->SetupAttachment(B);ソースファイルに書く
#include "Kismet/KismetSystemLibrary.h"

UKismetSystemLibrary::PrintString(UObject(thisなど), FString, Bool(Print to Screen), Bool(Print to Log), FLinearColor, Float(Duration))
はじめのBoolはスクリーン上に表示させるかどうか。次のBoolはOutputLogに表示させるかどうか。
使用例
Helloと表示される
UKismetSystemLibrary::PrintString(this, "Hello", true, true, FColor::Red, 10.0f);5と表示される
UKismetSystemLibrary::PrintString(this, FString::Printf(TEXT("%d"),5), true, true, FColor::Red, 10.0f);👇スクリーン上

👇OutputLog

FColor:0から255までの数値で、RGBを指定する。
FLinearColor:0から1の数値で、RGBを指定する。
例
FColor(255, 255, 255);
FLinearColor(0.0, 0.66, 1.0)
FLinearColorの型の変数に、FColorを代入することができる。逆はまだやっていないので分からない。そのうちやる。
ヘッダーファイル(Example.h)
VariableType:USceneComponent
VariableName:DefaultSceneRoot
public:

	UPROPERTY(EditAnywhere)
	USceneComponent* DefaultSceneRoot;
ソースファイル(Example.cpp)
Constructorに記述
SubobjectFName:SceneComponent
AExample::AExample()
{

	DefaultSceneRoot = CreateDefaultSubobject<USceneComponent>(TEXT("SceneComponent"));


	RootComponent = DefaultSceneRoot;
}Viewport上で切り替えられるようにする。
ヘッダーファイル(Example.h)
public:
	UPROPERTY(EditAnywhere, Category = "Point Light")
	bool bIsVisible = false;

protected:
	virtual void OnConstruction(const FTransform& Transform) override;
ソースファイル(Example.cpp)
void AExample::OnConstruction(const FTransform& Transform)
{
	PointLight->SetVisibility(bIsVisible);
}KismetSystemLibrary
PrintStringなど。
KismetMathLibrary
Add_IntIntなど。
KismetStringLibrary
Conv_IntToStringなど。
GameplayStatics
GetPlayerControllerなど。
①[#include]を追加。
型
#include “ライブラリ名.h”
例
#include "Kismet/KismetMathLibrary.h"②関数の呼び出し。
型
ライブラリ名::関数(引数);
例
UKismetMathLibrary::Add_IntInt(A, B);四則演算ではLibrary使わない方が簡単。
A + B;基本的にはLibraryを使った方が楽に書けるんだと思う。
このKismetLibraryはBlueprintでの使用のために作られたものなのかも。
選択して、Ctrl + K →C
(Visual Studio)
Alt + Shift + ドラッグ
変数Aをfloatに一時的に変換する場合、
(float)A
とすればよい。変換することをCastという。
Three added to four makes seven.
Three plus four equals seven.
Two from ten is eight.
Two subtracted from ten leaves eight.
Ten minus two equals eight.
Three multiplied by two is six.
Three times two equals six.
Eight divided by four equals two.
Ctrl + Alt + F11
switch (変数)
{
     case 値1:{処理; break;}
     case 値2:{処理; break;}
     default:{処理;}
}
処理がひとつなら、中括弧は省略可能。caseの数は増やすことは可能。
①親クラスとしてNoneを選択。
②ソースファイル(Example.cpp)をExplorerで削除。
③ヘッダーファイル(Example.h)で下記のようにコードを作成。
// Fill out your copyright notice in the Description page of Project Settings.

#pragma once

#include "CoreMinimal.h"
#include "Example.generated.h"

UENUM(BlueprintType)
enum class EExample : uint8
{
	Example0,
	Example1,
	Example2,
	Example3
};
作ったEnumはBlueprintで使うこともできる。
④必要ならばDisplayNameを設定する。
// Fill out your copyright notice in the Description page of Project Settings.

#pragma once

#include "CoreMinimal.h"
#include "Example.generated.h"

UENUM(BlueprintType)
enum class EExample : uint8
{
	Example0     UMETA(DisplayName = "A"),
	Example1     UMETA(DisplayName = "B"),
	Example2     UMETA(DisplayName = "C"),
	Example3     UMETA(DisplayName = "D")
};
ここでDisplayNameを設定すると、Blueprintの実行ピンの名前が変わる。その他の影響は知らない。
①ヘッダーファイルで、作ったEnum(Example.h)をincludeする。
#include "Example.h"②呼び出す。
EExample::Example0例1:変数の作成
EExample 変数名 = EExample::Example1;例2:switchのcaseにつかう
case EExample::Example2:①ヘッダーファイルでプロトタイプを宣言。
②関数名にカーソルを合わせて、▼をクリック[Create Implementation]。関数の定義を書く。
変数の型 AExample::関数名(引数の型 引数, 引数の型 引数)
{ 処理; }値渡し
戻り値の型 関数名(引数の型 引数名, 引数の型 引数名);参照渡し
戻り値の型 関数名(引数の型& 引数名, 引数の型& 引数名);#include "Kismet/GameplayStatics.h"EnableInput(UGameplayStatics::GetPlayerController(GetWorld(), 0));キーを押したとき
InputComponent->BindKey(EKeys::キー, IE_Pressed, this, &AExample::関数名);
キーを離したとき
InputComponent->BindKey(EKeys::キー, IE_Released, this, &AExample::関数名);事前に、[~.Build.cs]の中の、[PublicDependencyModuleNames]の中に、SlateとSlateCoreを追加しておく。[PrivateDependencyModuleNames]の中に入れても問題なかった。コメントをアンコメントして使った方が楽かも。
PublicDependencyModuleNames.AddRange(new string[] { "Core", "CoreUObject", "Engine", "InputCore", "Slate", "SlateCore" });
InputComponent->BindKeyに必要なライブラリがSlate,SlateCoreにある。
InputComponent->BindAction("アクション名", IE_Pressed, this, &AExample::関数名;アクション名は、project settingのinputで設定したもの
DECLARE_DYNAMIC_MULTICAST_DELEGATE( DeligateName );

UPROPERTY(BlueprintAssignable, Category = "カテゴリー名")
DeligateName ディスパッチャー名;UFUNCTION()
void カスタムイベント名();ディスパッチャー名.AddDynamic(this, &AExample::カスタムイベント名);ディスパッチャー名.Broadcast();TArray<変数の型> 変数名 = { A, B, C };TEXT("こんにちは")参考英語
"Hello World!"追記2022年6月9日
後日、TEXTを使って日本語入力しようと思ったができなかった。
英語版のVisual Studio使っているが文字化けしてしまう。
何かわかったら追記。

FMath::RandRange(Min, Max)ArrayName.Num()for (int32 i = 0; i <= Messages.Num() - 1; i++)
{
UKismetSystemLibrary::PrintString(this, Messages[i], true, true, TextColor, Duration);
}iの範囲をあらわすとき、不等号の右側は括弧でまとめなくても大丈夫だった。
if (Messages[i].Contains(TEXT("文字列")))
{
break;
}
次のループに移る場合はbreakの代わりにcontinueを使う。その回の続きの処理を行わずに、次のループに移る。for文における、continueのブループリントは今のところ用意されていない。
👇配列に対するfor文の例。
for (FString Message : Messages)
{
if (Message.Contains(TEXT("文字列")))
{
break;
}
UKismetSystemLibrary::PrintString(this, Message, true, true, TextColor, Duration);
}①親クラスとしてNoneを選択。
②ソースファイル(Example.cpp)をExplorerで削除。(sourceフォルダに入っている。)
③ヘッダーファイル(Example.h)で下記のようにコードを作成。
#pragma once

#include "CoreMinimal.h"

#include "Example.generated.h"

USTRUCT(BlueprintType)
struct FExample
{
	GENERATED_BODY()

	変数宣言;
};FExample ExampleInfo = {A, B, C};TArray<FExample> ExampleInfos = {{A,B,C},{D,E,F}};👇サードパーソンのテンプレートを使う場合、BPで作り始めて、途中でC++を追加したほうが良さそう。C++で作り始めると移動などの入力について、BPではなくC++で記述されてしまう。C++初心者にとってはきつい。
①CharacterのC++クラスを作成。
②[File]>[Reparent Blueprint]から、作成したクラスを使用する。
UFUNCTIONマクロ。これをヘッダファイルに作っておくことで、自作のノードがBPで使えるようになる。キルZの処理を記述できるのは嬉しい。
下はその一例。キルZの処理の記述。
FellOutOfWorldの関数自体はImplement Virtual Methodをつかったら簡単に記述できる。
AdvancedCharacter.h
public:
void FellOutOfWorld(const class UDamageType& dmgType) override;

UFUNCTION(BlueprintImplementableEvent)
void OnFellOutOfWorld();
AdvancedCharacter.cpp
void AAdvancedCharacter::FellOutOfWorld(const class UDamageType& dmgType)
{
	OnFellOutOfWorld();
}
👇作成したOnFellOutOfWorldのノードを使ったBP
👇リスポーンするBP
クラス名を右クリック>Quick Actions and Refactorings>Implement Virtual Method
Visual Assist(有料)の機能。クラスで使える関数を呼び出せる。

↓検索して、チェックをいれてOK。

↓自動的にコードが作成される。
ヘッダファイル

ソースファイル

Twitterしてます
ブログの更新をお知らせ


コメント