
高機能なゲームエンジンであるUnreal Engineは無料で簡単に始めることができます。
インストールの仕方などは以前の記事をどうぞ。
前回の続きで、First PersonのBPを学びました。
前回はキャラクターが近づくと開くドアをつくりましたが、今回は床のスイッチを踏むとドアが開くようにしました。キャラクター以外の物体をスイッチの上に乗せてもドアは開きます。
参考動画
ゲームデザイナーのためのブループリントとゲームプレイ>他のアクタとのインタラクションで開く
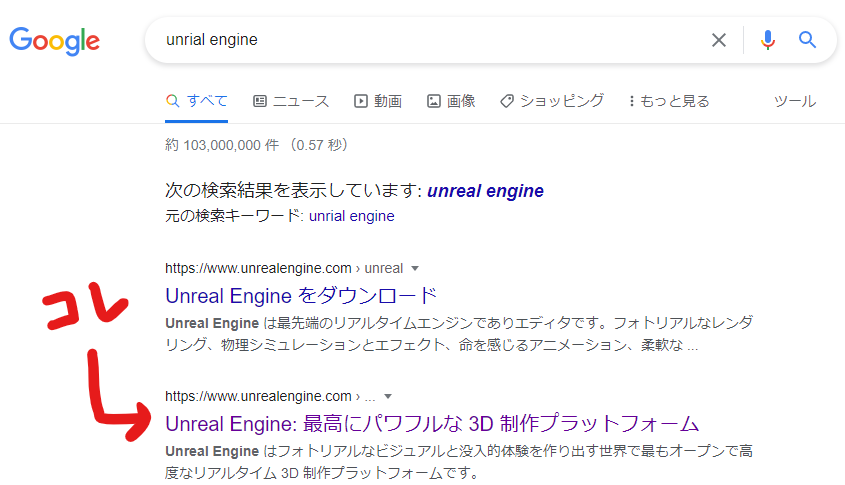
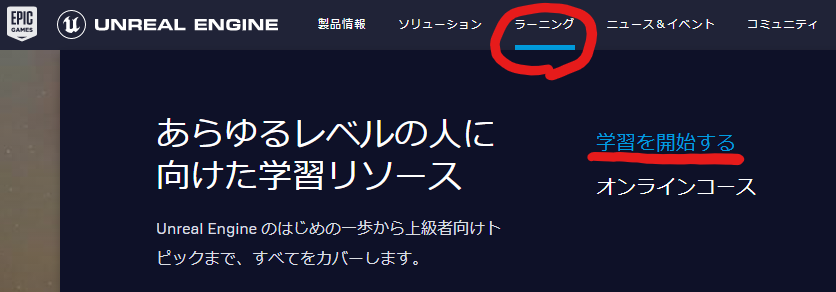
1.Googleで検索する。そして画像の手順にすすめる。
↓
↓
↓
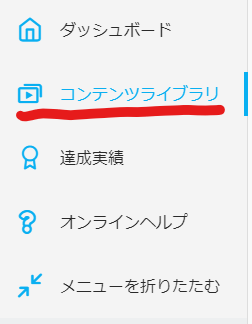
2.左のウィジェットからコンテンツライブラリを選ぶ。
3.中央にある検索窓から見たい動画を検索。

4.動画を見る。
今回はEpicから配布されている[Blueprints and Gameplay In Development]というプロジェクトを使って学習しています。
1.Unreal engineのサイトのトップバーから、PERSONALを選ぶ。
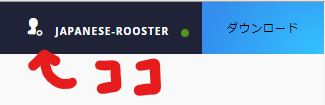
(まずサイト右上のIDにカーソルを合わせる)
↓

(PERSONALを選ぶ)
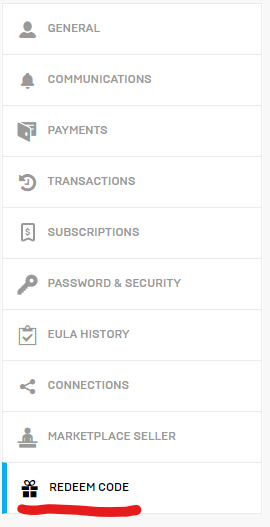
2.REDEEM CODE(コードの利用)を選ぶ。
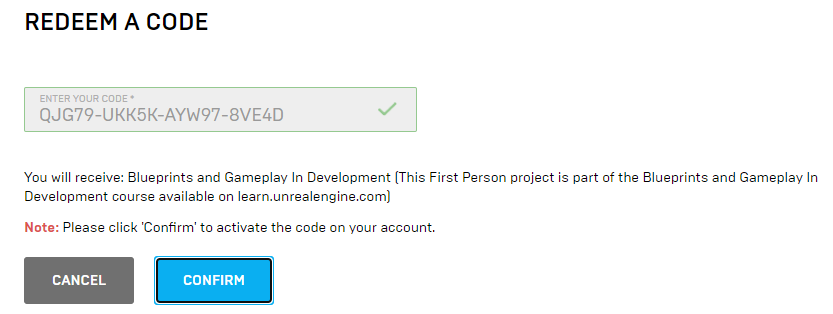
3.次のコードを入力して、REDEEM(コードを利用)をクリック。
QJG79-UKK5K-AYW97-8VE4D
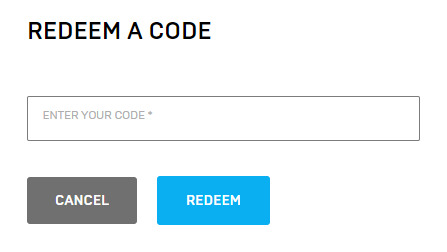
4.COMFIRM(確認)をクリック。
学習内容

知識
意味:参照
詳しくはこちらで。
ブループリント
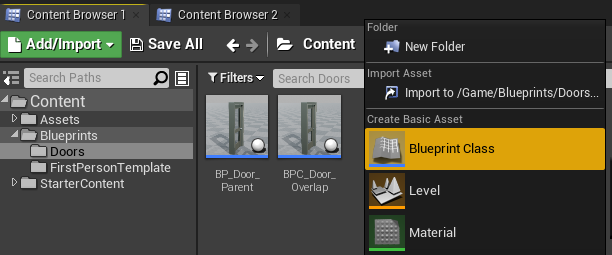
場所:UE4のコンテンツブラウザ
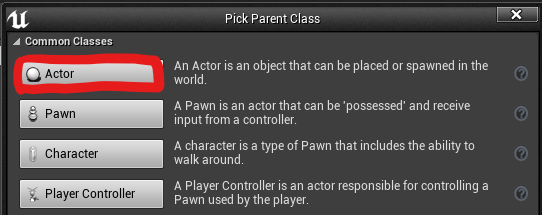
新しいブループリントを作成する。クラスはActor。名前は[BP_PressurePlate]とする。
↓
↓

場所:BP_PressurePlate

手順・注意点
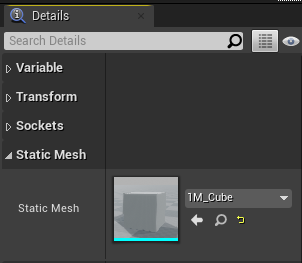
1.[Add Component]で、[PressurePlate]という名前の[StaticMesh]を作る。
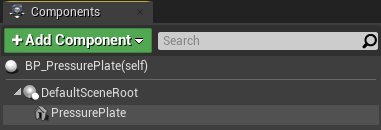
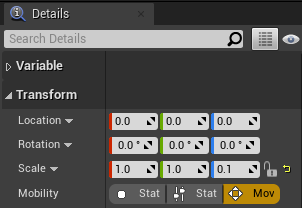
2.Detailsパネルで[PressurePlate]の[Static Mesh]として[1M_Cube]を選び、[Scale]を(1.0, 1.0, 0.1)にする。
↓
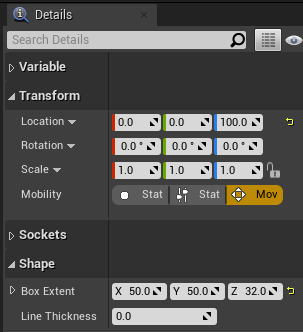
3.[Add Component]から[Box Collision]を作成する。名前は[Box]のままでよい。[Scale]は(1.0, 1.0, 1.0)、[Box Extent]は(50.0, 50.0, 32.0)とする。

↓
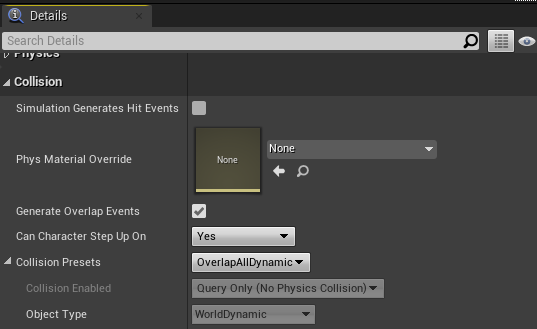
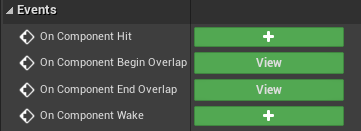
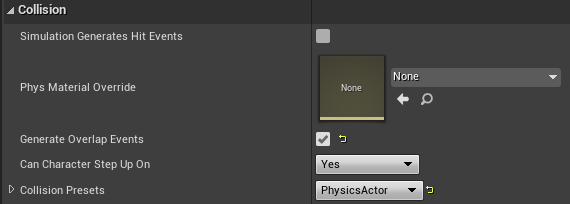
4.[Collision]の設定は以下の画像のようにする。(初期設定のまま)
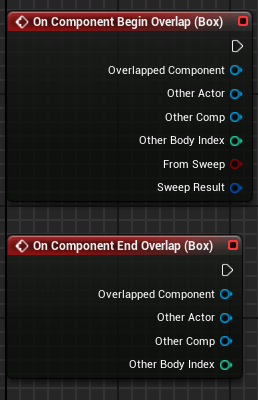
5.前回と同様に、[Begin Overlap]と[End Overlap]を作成する。
↓
6.[BP_PressurePlate]はドアのBPの子ではないので、前回とは異なりリファレンスを作る必要がある。
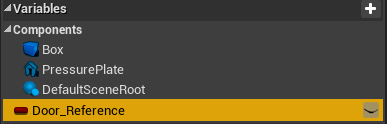
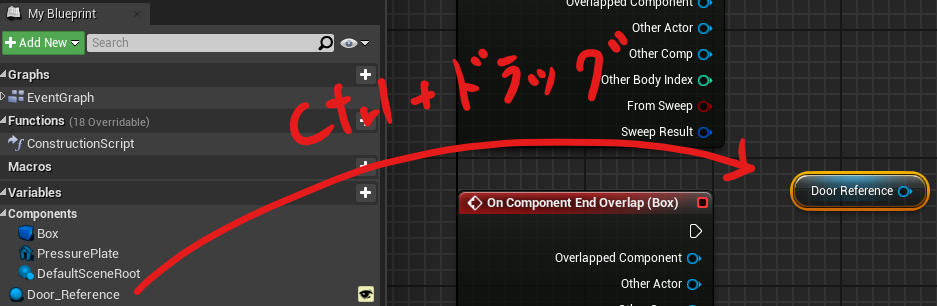
左下の[My Blueprint]パネルから[+Variable]を選び、新しい変数を作る。名前は[Door_Reference]とする。
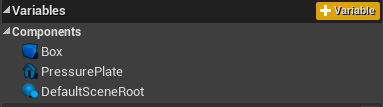
↓
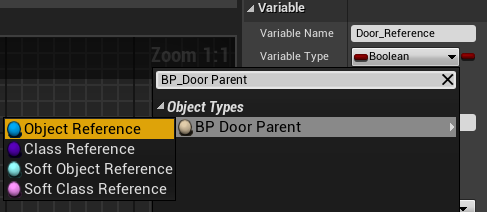
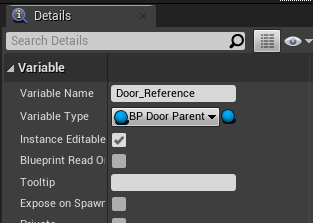
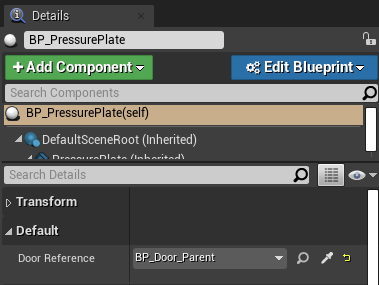
7.[Door_Reference]を選択した状態でDetailsパネルを編集する。[Variable Type]を[BP_DoorParent]にして、[Instance Editable]にチェックを入れる。その後、[Door_Reference]をGetする。
↓
↓
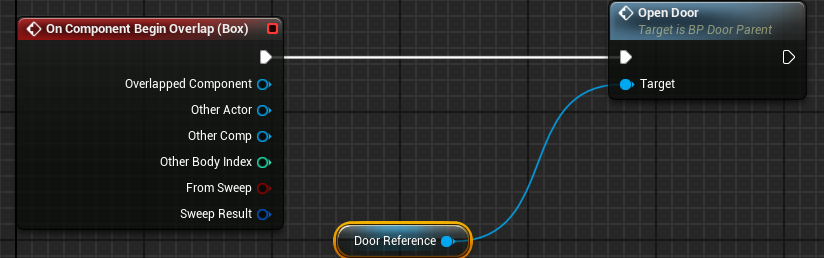
8.[DoorReference]から[OpenDoor]を出して[BeginOverlap]と繋げる。
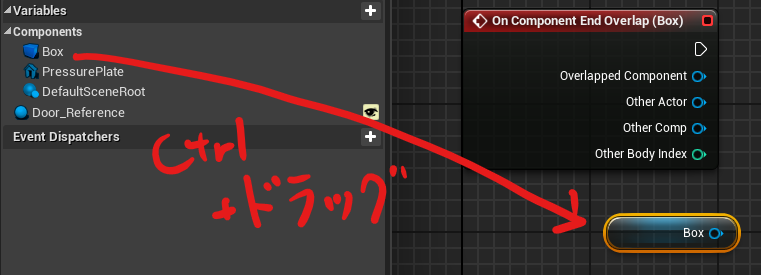
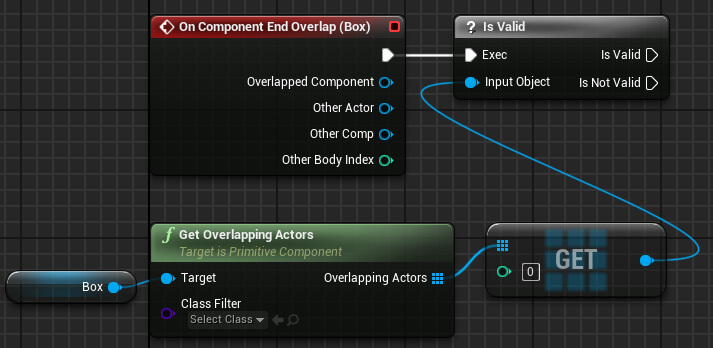
9.[Box]をGetする。
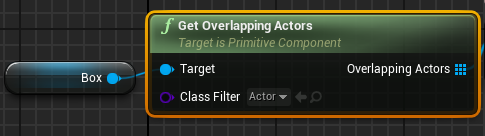
10.[Box]から[Get Overlapping Actors]を作成する。[Class Filter]を[Actor]にする。
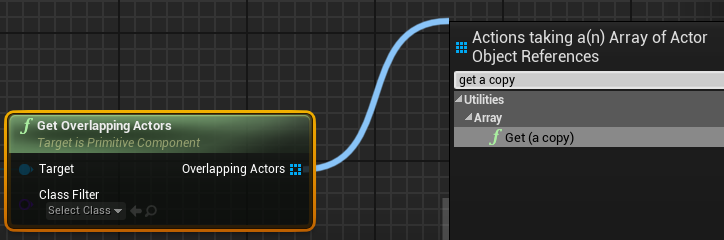
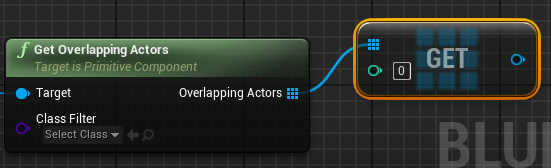
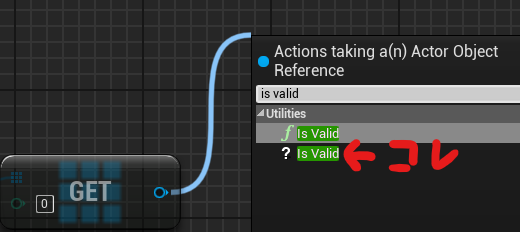
11.[Get Overlapping Actors]から[Get (a copy)]を作成する。
↓
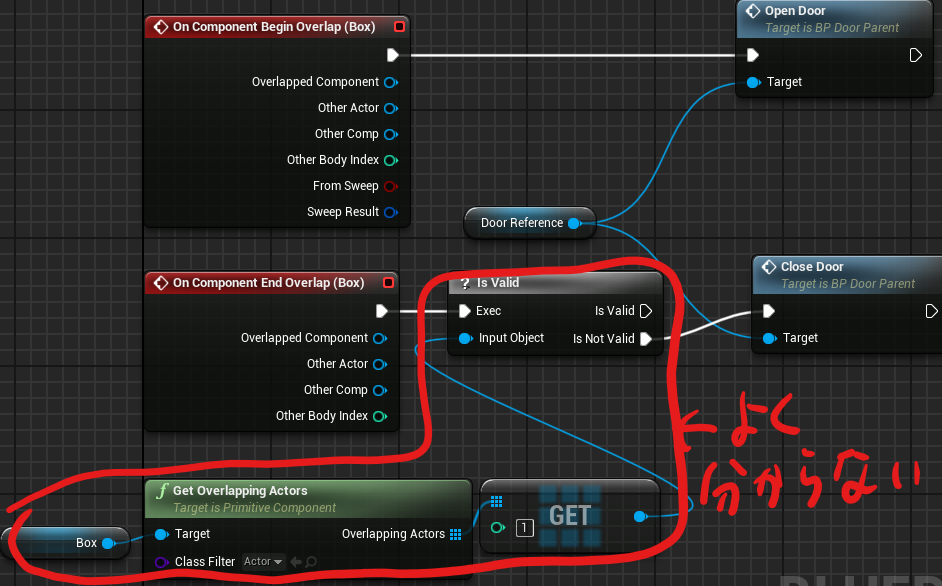
12.[Get (a copy)]から[? is Valid]を作成して[End Overlap]と繋げる。
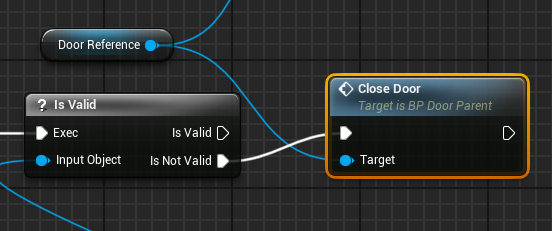
↓
13.[Door Reference]から[Close Door]を作成して、[? is Valid]の[is Not Valid]と繋げる。
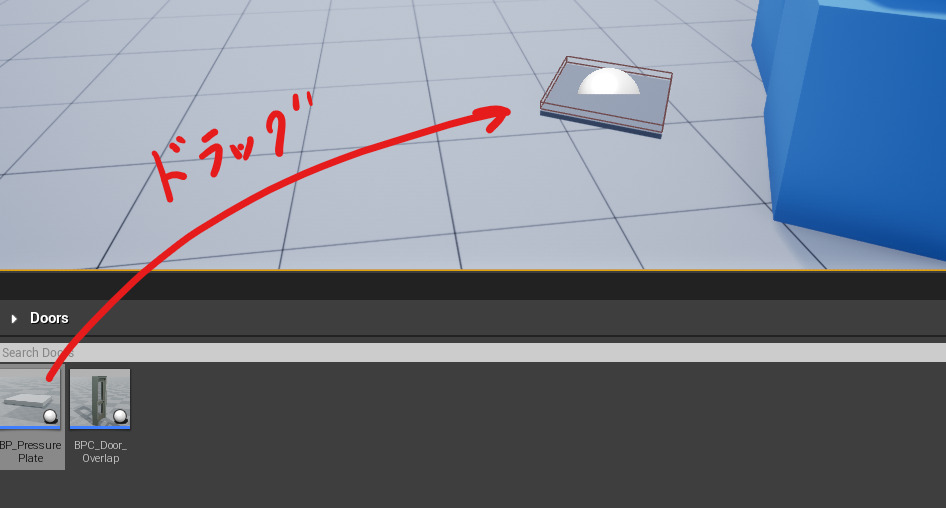
14.UE4のエディタに戻り、[BP_Door_Parent]を[Viewport]にドラッグする。
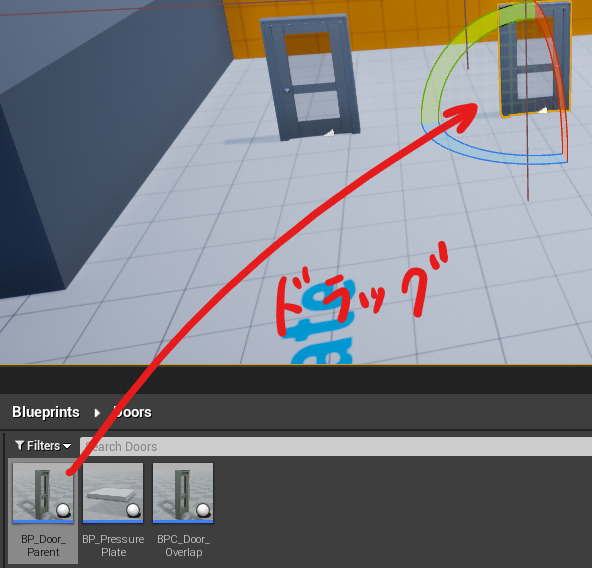
15.[BP_PressurePlate]を青いボックスのそばに配置して 、[Door Reference]として[BP_Door_Parent]を選ぶ。
↓
16.青いボックスの[Generate Overlap Events]にチェックを入れ、[Collision Presets]を[PhysicsActor]にする。
疑問点
動画では、[Pressure Plate]に乗るとドアが開くが、[Pressure Plate]から離れてもドアが閉まらないと言っていたが、閉まってしまった。
ドアを閉めるために、[Get]の値を[0]から[1]に変更していたが、どちらであっても挙動に差はなかった。
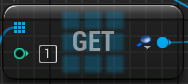
最後までやってみましたが、下の赤枠の部分の意味が良く分かっていないです。とりあえず、先に進みますが、ここが理解できたら修正します。
あと、このドアは開いていなくても通り抜けができてしまうので、通り抜けできないようにしたい。フレームの部分は通れないので少しだけ問題点を探しましたが、良く分かりませんでした。
コメント