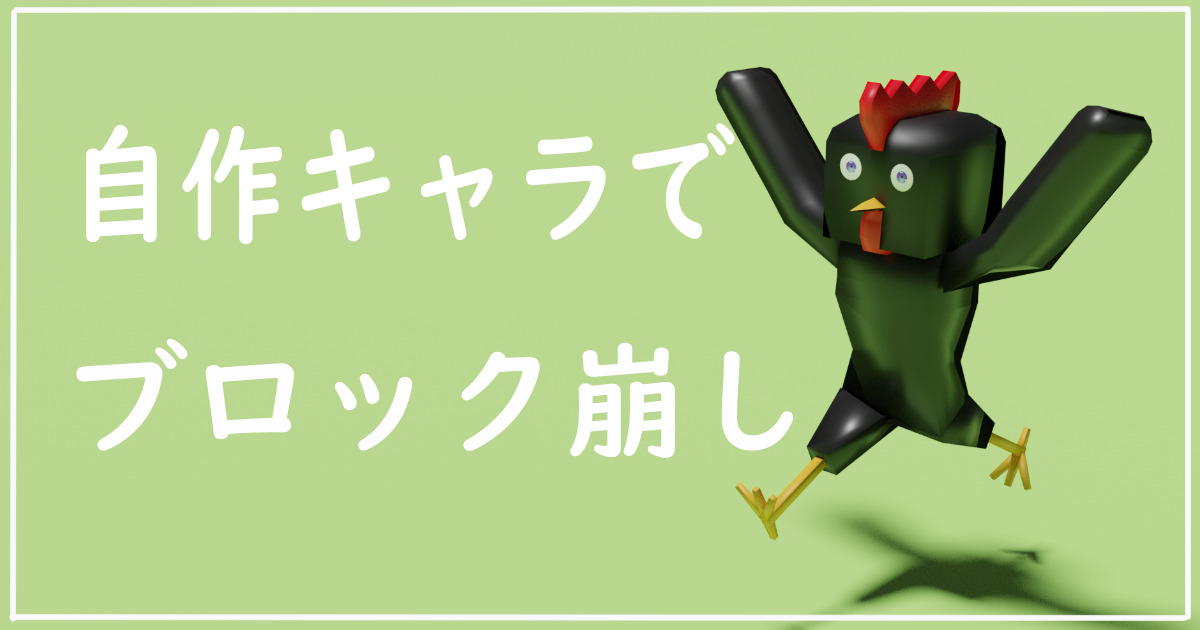
空白のプロジェクトからブロック崩しを作成しました。
必要なのはUE4のインストールだけ。
自作キャラがいなくても、Third Personから移行させて作れます。
その方法も説明してあります。簡単です。
👇インストール方法はこちら

👇クリックしたら中身が見れます
【手順】→【関連知識】→【関連スキル】の順にまとめています。
【手順】から読むのがオススメ。
👇キャラクターを自作したい人はこちら

👇Unreal Engineのインストール方法はこちらから
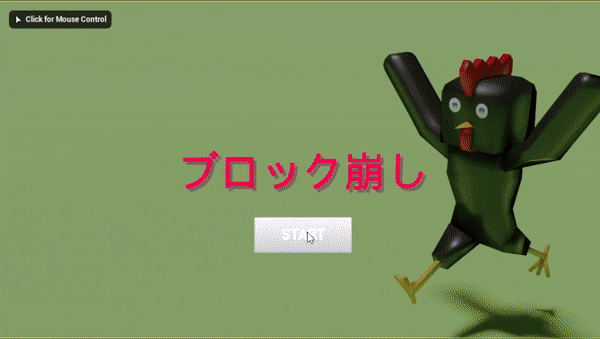
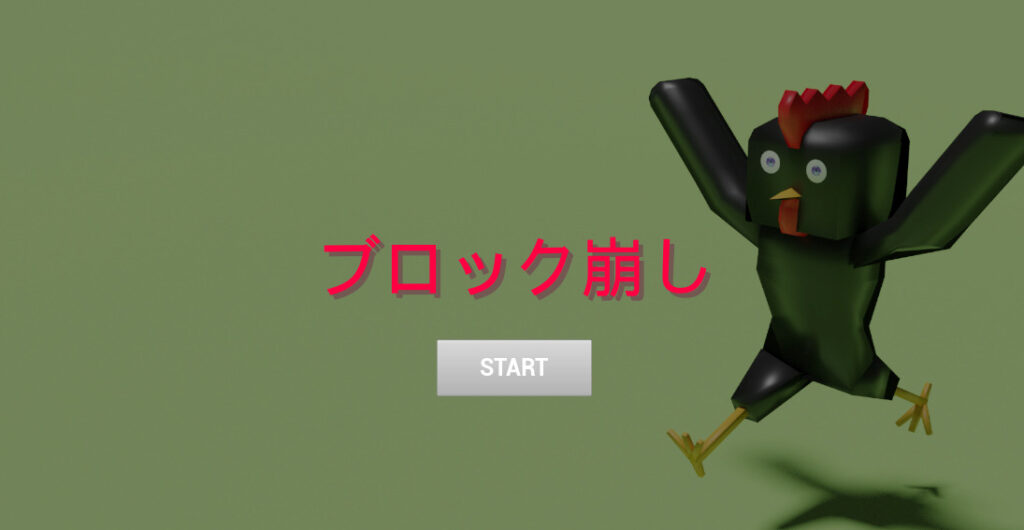
ブロック崩し
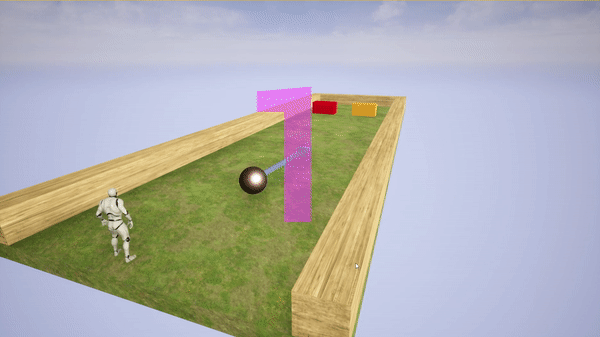
複雑なゲームを作るのは難しいので、とりあえず、単純なゲームを作ります。とりあえずこれを作ればゲーム制作者と名乗れる!
手順
下準備
[Games]を選んで[Next]

[Blank]を選んで[Next]
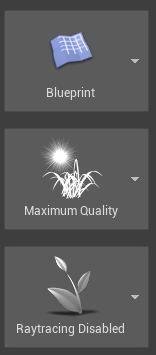
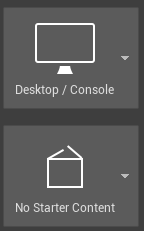
次の設定を選ぶ。
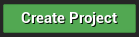
好きに保存場所を選んで[Create Project]
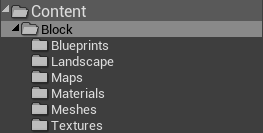
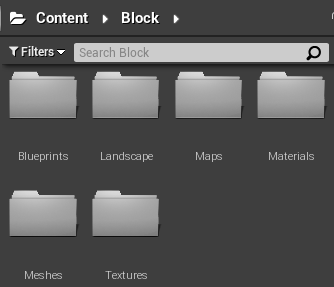
Unrealの動画を参考にした分類。
[Unrealの背景アーティストになるために]>[フォルダの設定]
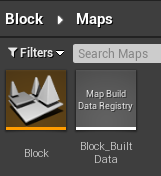
左上のバーから[File]>[Save Current As…]を選択する。

場所は[Maps]、名前は好きに決める。
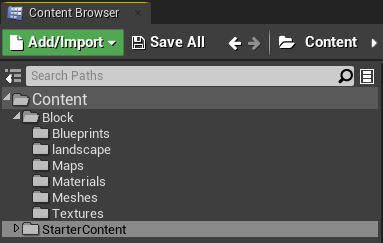
1.[Content Browser]で[Add/Import]をクリック。
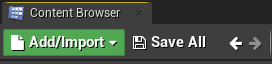
2.[Add Feature or Content Pack…]をクリック。

3.[Content Packs]を選択。

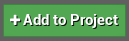
4.[Starter Content]を選択。
5. [Add to Project]
↓
1.右クリックして[Blueprint Class]を選択。

2.[Game Mode Base]を選択。
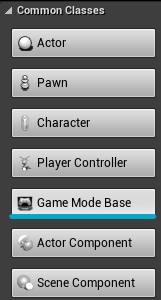
3.名前をつける。
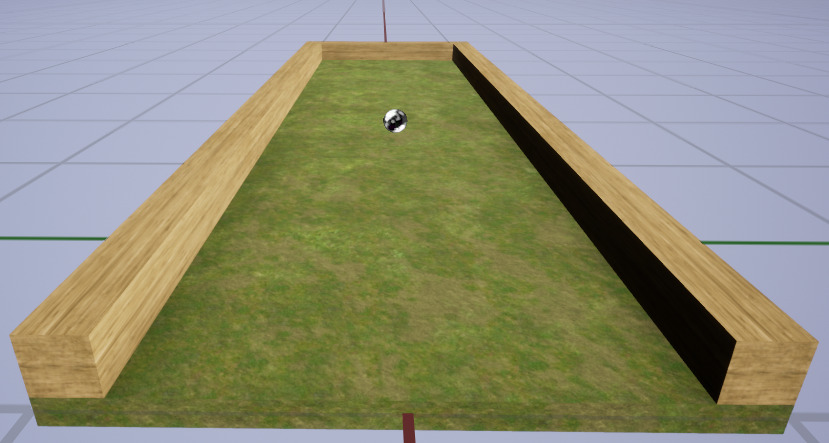
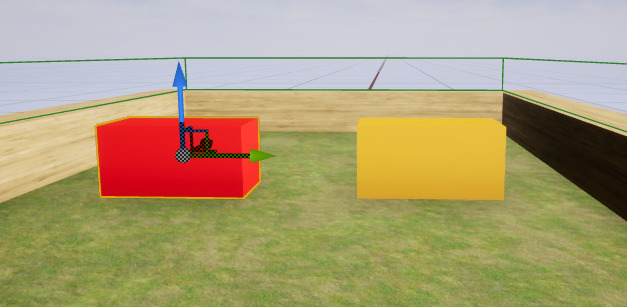
キューブなどをコピーして、適当に作る。
移動・回転・拡縮の最小変化量。

Viewport右上のアイコンで調整可能。
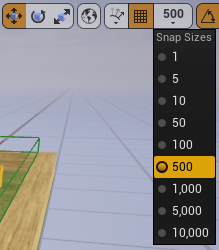
Alt + 矢印をドラッグ
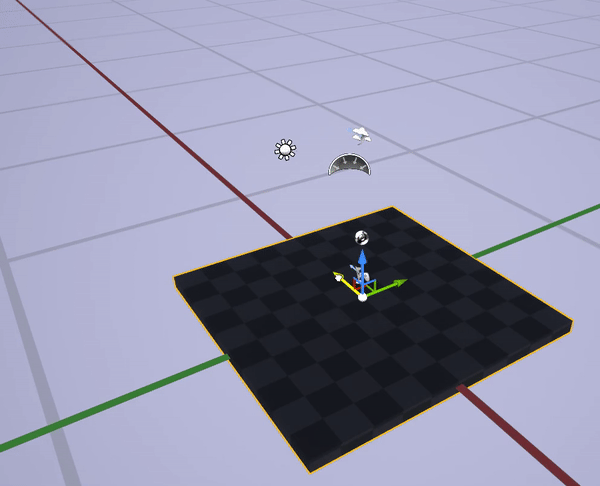
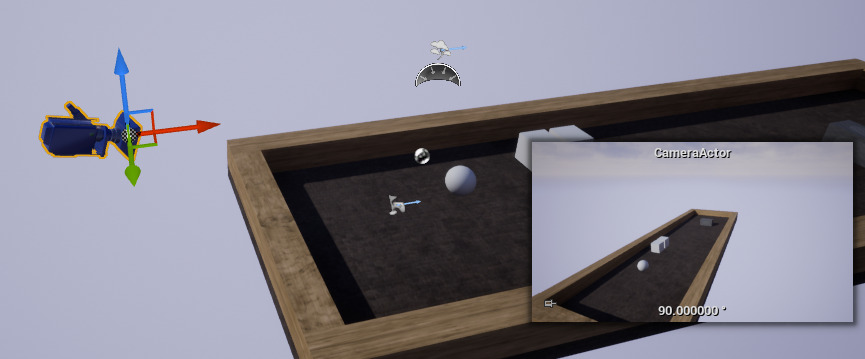
1.カメラをViewportにドラッグ
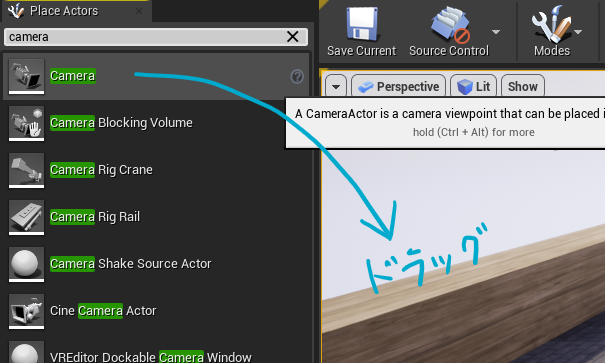
2.ちょうどよい位置に移動。
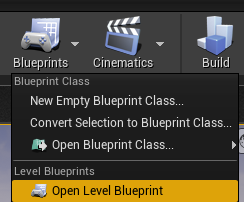
3.画面上のメニューバーの[Blueprints]から[Open Level Blueprint]を選択。
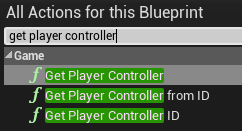
4.右クリックして[Get Player Controller]のノードを作成。
5.[World Outliner]から、[CameraActor]をドラッグ。
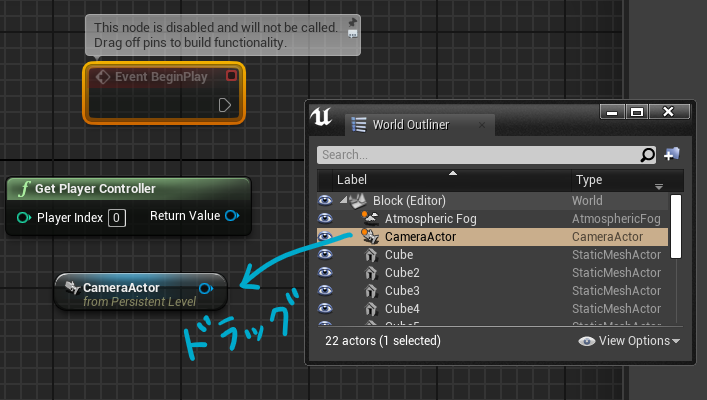
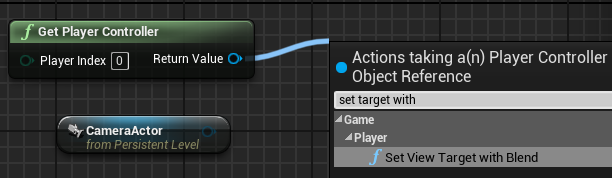
6.[Get Player Controller]から線を出して、[Set View Target with Blend]を選択。
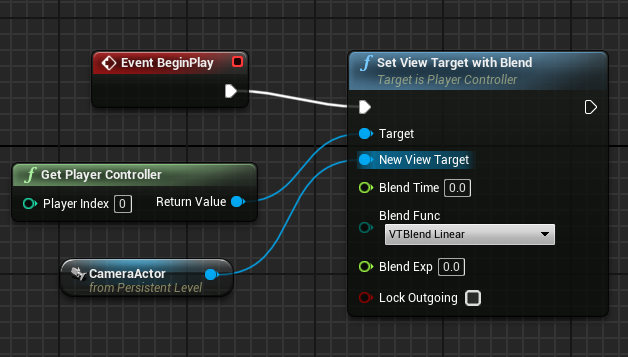
7.下の画像のように、それぞれのノードを接続。([Event BeginPlay]は初めから用意されているノード。無かったら右クリックから作成。)
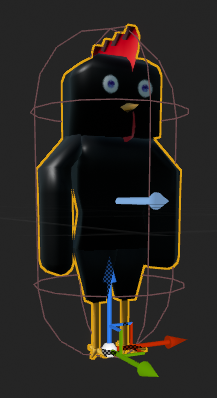
キャラクター作成
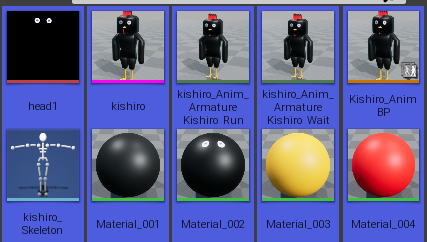
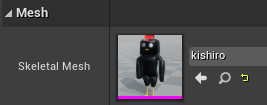
前回作ったキャラクターをレベルに移行する。
👇キャラクターを持っていない人はこちらからの方法で。
[Games]を選んで[Next]
[Third Person]を選んで[Next]
次の設定を選ぶ。
好きに保存場所を選んで[Create Project]
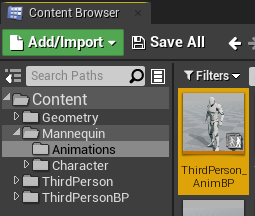
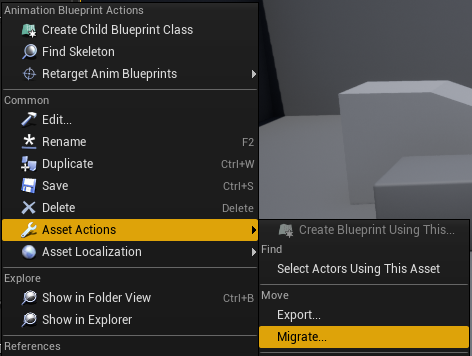
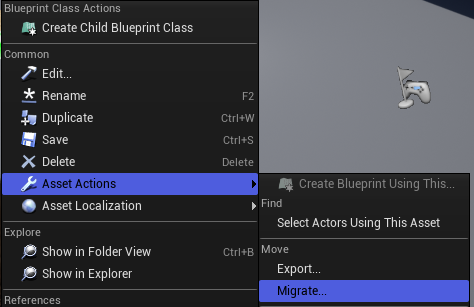
コンテンツブラウザの[Animation]フォルダ内の[ThirdPerson_AnimBP]の上で右クリック。
[Asset Actions]から[Migrate…]を選択。
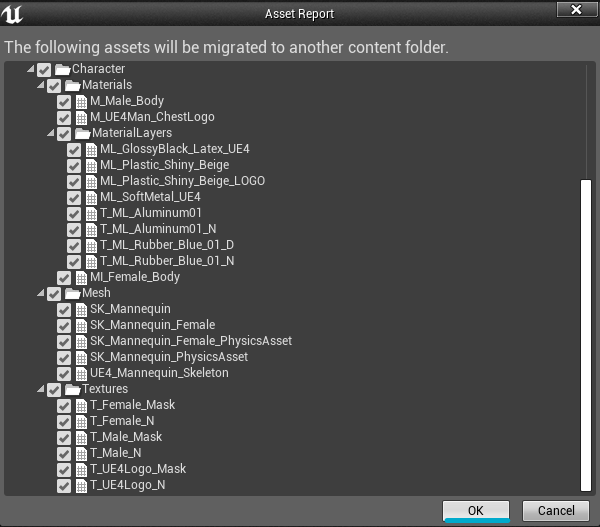
[OK]を選択。
(チェックを外していないので、[Anim_BP]と関連したものが全て移行される。)
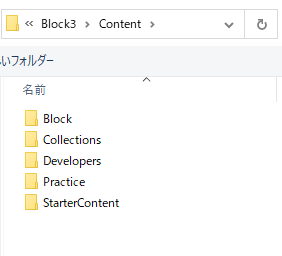
移行場所として、ブロック崩しのプロジェクトの[Content]フォルダを選ぶ。
↓

1.前回つくったプロジェクトから、移行するアセットを選択。
2.右クリックして、[Asset Actions]から[Migrate…]を選択。
3.作成しているプロジェクトの中の[Content]ファイルを選んで移行(Migrate)。

↓

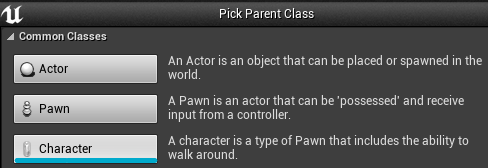
1.[Blueprints]フォルダ内で右クリック。[Blueprint Class]を選択する。
2.[Character]を選択する
3.名前を決める。
4.画面左の[Components]パネルで[Mesh]を選択。
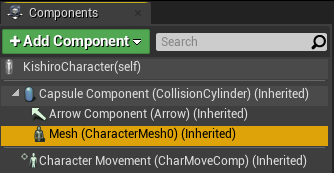
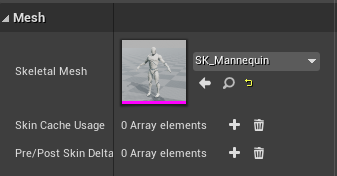
5.画面右の[Details]パネルで[Mesh]を入れ替える。
5.メッシュの入れ替え。
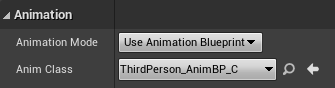
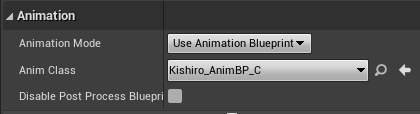
6.AnimBPの適用。
これ以降は自作キャラと同じ。
6.アニメーションBPを適用
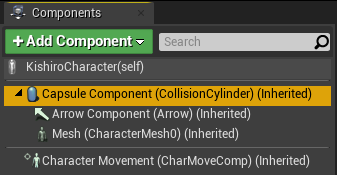
7.[Components]パネルで[Capsule]を選択。
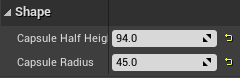
8.右の[Details]パネルで[Shape]をキャラクターに合わせて変更。
↓
9.画面左の[Components]パネルで[Character Movement]を選択。
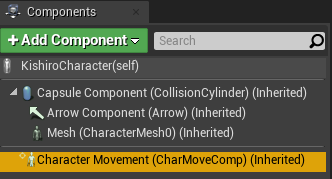
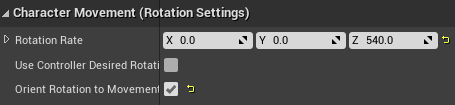
10.Character Movementの設定。
11.画面左[Components]パネルで[…(self)]を選択。

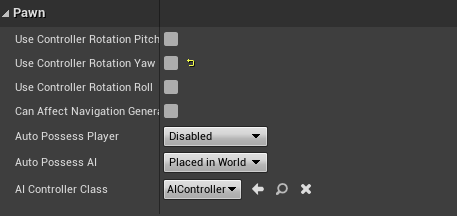
12.画面右[Details]パネルの[Pawn]から、[Use Controller Rotation Yaw]の ✓ を外す。
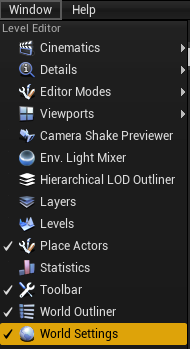
[Window]タブから、[World Settings]をクリックする。
↓
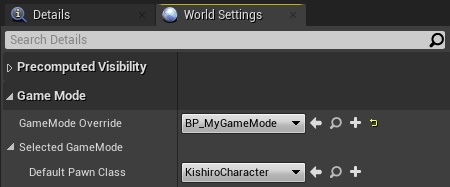
画面右、[Details]パネルの隣にタブができる。
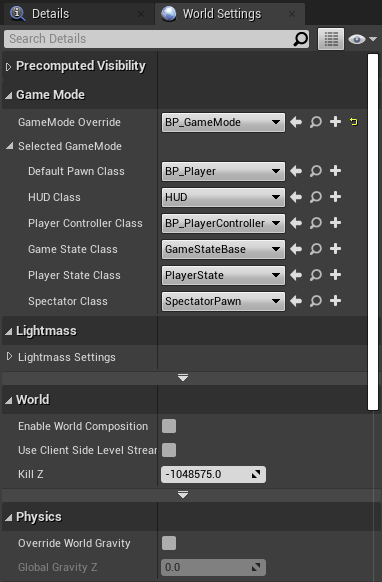
[GameMode Override]と[Default Pawn Class]に、作った Game Mode とキャラクターを設定する。
キャラクターの移動
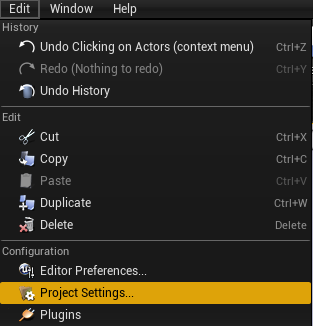
1.[Edit]から[Project Settings…]を選択。
2.[Engine]の中の[Input]を選ぶ。
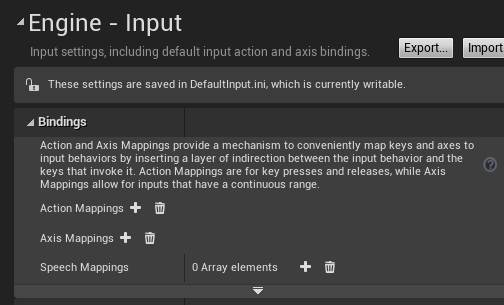
3.[Action Mappings]か[Axis Mappings]の右の[ + ]をクリック。名前、割り当てるキー、Scaleを入力する。
4.複数のキーを割り当てる場合は、名前の右の[ + ]をクリック。先ほどと同様に、名前、割り当てるキー、Scaleを入力する。

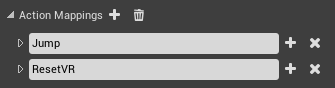
[Pressed]と[Released]の2つの状態のイベントを取得できる。
赤い帽子をかぶった配管工のように、ボタンを押している長さでジャンプ量が変わるようにできる。
【参考】Third Person のテンプレート
押し込み具合によるイベントを取得できる。らしい。
たぶん、強く押し込むほど速く移動したり出来る。
【参考】Third Person のテンプレート
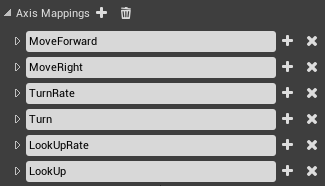
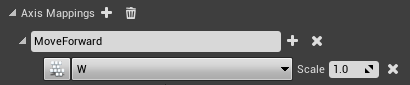
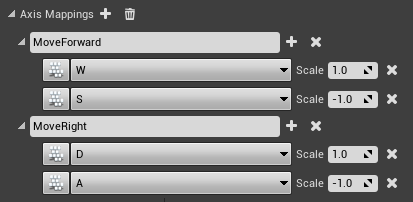
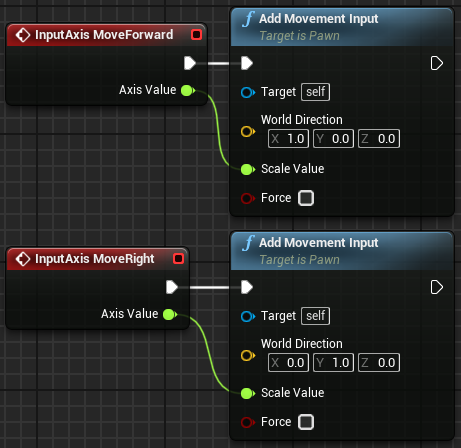
[Axis Mappings]に[MoveForward]と[MoveRight]を作成。それぞれ下のようにキーと Scale を割り当てる。
移動キーが押されたときに、どのように移動するかBPをつくる。
場所:キャラクターBPの[Event Graph]

右クリックをして名前を検索ボックスに入れたらノードの作成はできる。あとは線をつないで数値を入力するだけ。
World Directionの数値入力を忘れないように。
👇クリックで拡大
当たり判定(Collision)
👇当たり判定とボールの発射について丁寧に解説しています。

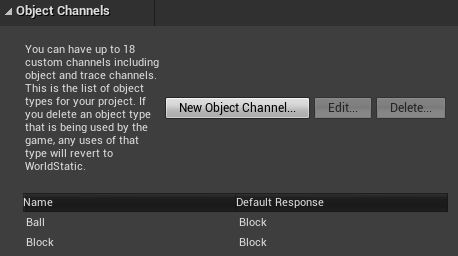
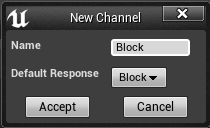
新しく[Ball]と[Block]のChannelを作成する。
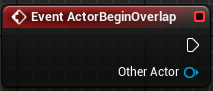
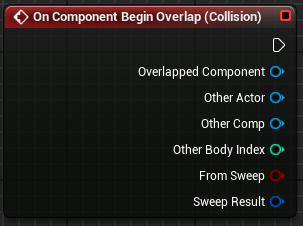
物体同士が触れたかどうかの判定。また、その判定につかうもの。
「当たる」「入る」「出る」の3つがある。
それぞれに対してイベントを設定できる。
当たる
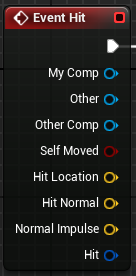
入る
出る
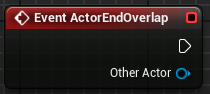
[On Component]と[Event Actor]ではとれる情報量(ピンの数)などが違う。
物体が当たったとき対象ごとに、
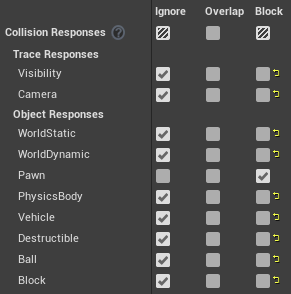
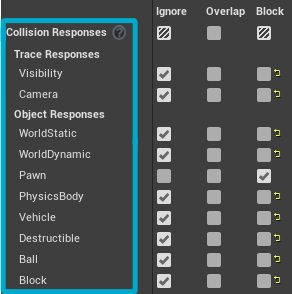
無視する(Ignore)か、重なる(Overlap)か、ぶつかる(Block)かを決める設定。
例1:プレイヤーの前に置くボックストリガー
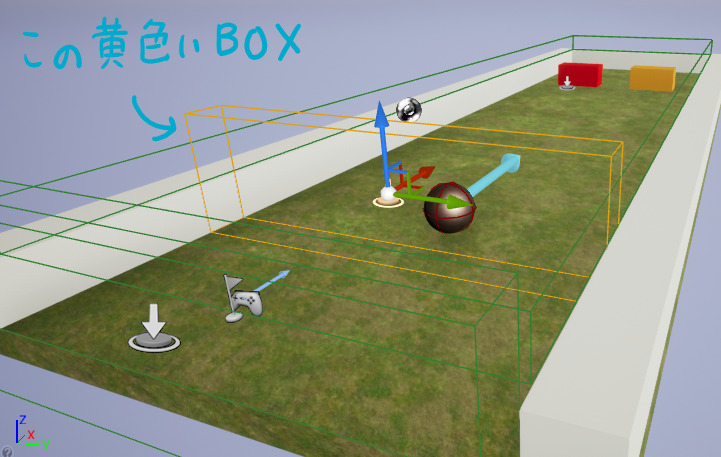
キャラクター(Pawn)だけをブロックして、他は無視する設定にした。
例2:プレイヤーの後ろのボックストリガー
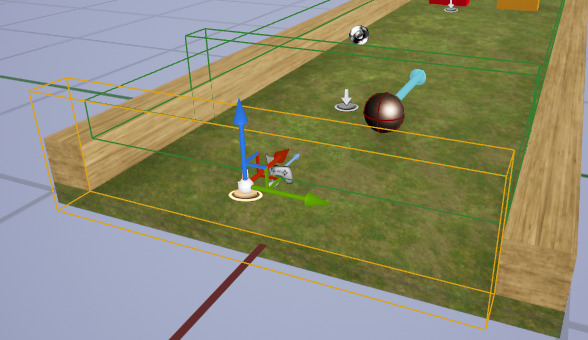
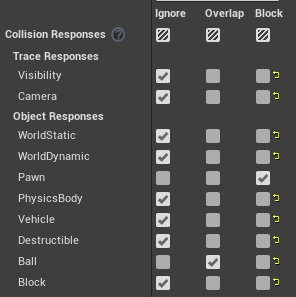
Ballに対して[Overlap]にすることで、イベントを追加する。Ballがこのボックスに触れたときゲームオーバーのUIを表示する。
Ignore はイベント作成できない。
Overlap はイベント作成できる。
フィルターの対象
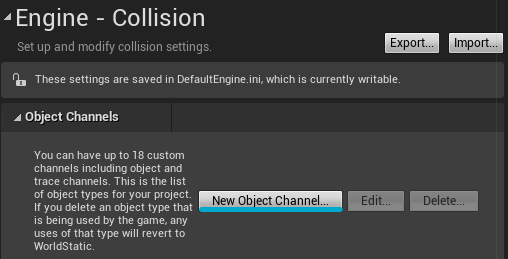
1.[Edit]>[Project Settings]>[Engine]>[Collision]より、[New Object Channel…]を選択。
2.名前と[Default Response]を決めて[Accept]。
👇詳しくはこちらの記事で解説
速さが減衰しないように設定

1.下のようなコンポーネントを使用する。
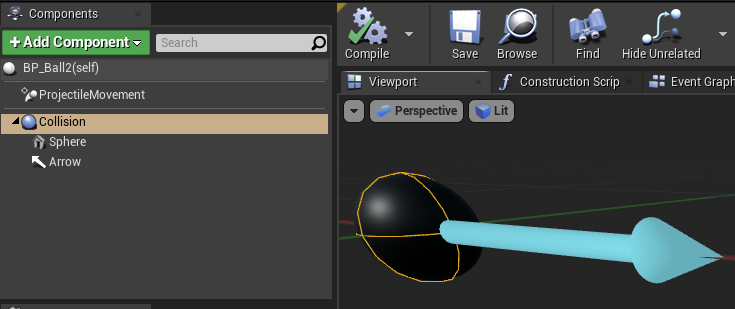
1.[Components]パネルにて[Add Component]から、[Projectile Movement]と[Sphere Collision]と[Arrow]と[Sphere]をつくる。
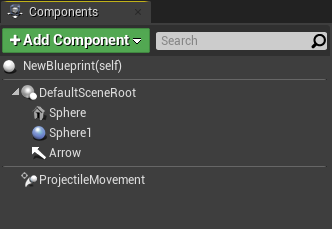
2.[Collision Sphere]を[Default Scene Root]にドラッグする。
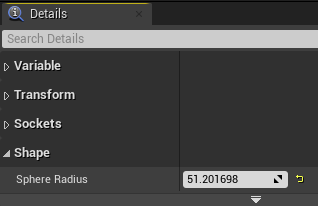
3.画面右の[Details]パネルにて、[Sphere Collision]の大きさを[Sphere]と同じくらいになるように調整する。
↓
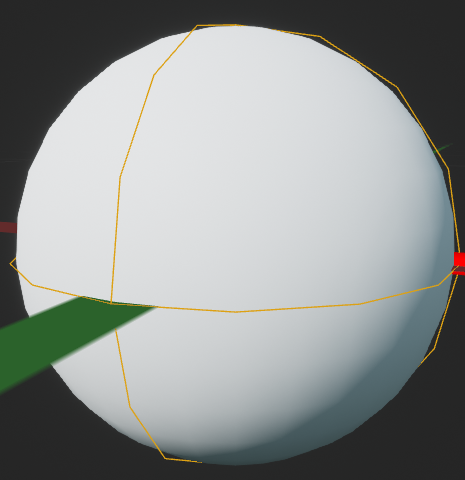
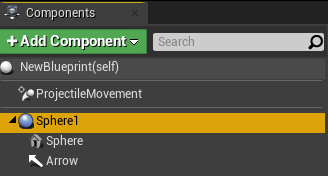
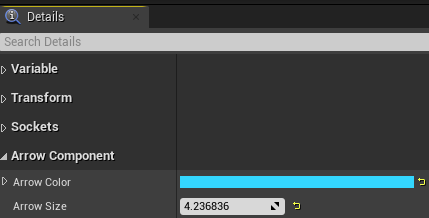
4.[Arrow]を選択。
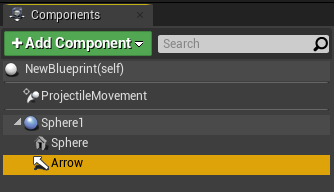
5.色と大きさを変更。
↓
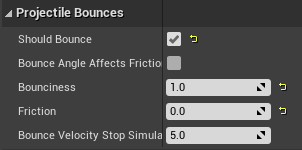
2.[Projectile Movement]を選択し、[Details]パネルで設定する。
初速度[Initial Speed]は後でBPを使って与える。
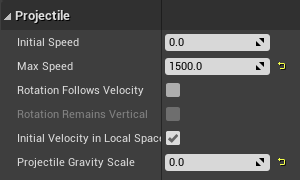
Bouncinessを1にすることで、衝突時の速さの減衰がなくなる。
Frictionを0にすることで、摩擦がなくなる。
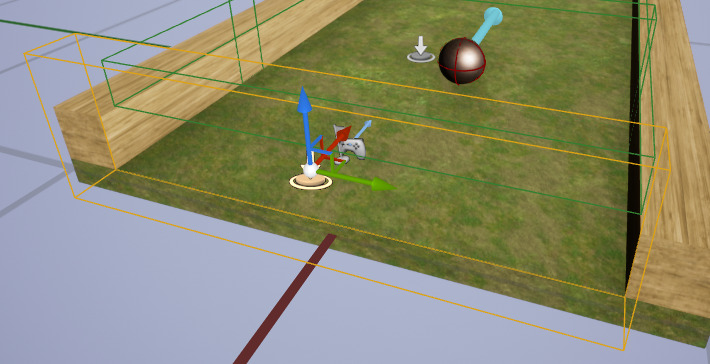
Z軸方向に移動しないようする。
1.上から無理やりボックストリガーで抑えこむ。
(もっと良い方法はあるはず。)
2.フィルターは下の画像のように設定した。
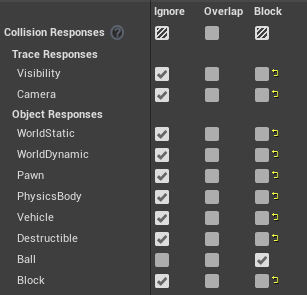
物体同士が当たったときに、
無視する(Ignore)か、重なる(Overlap)か、ぶつかる(Block)かを決めるもの。
Ignore はイベント作成できない。
Overlap はイベント作成できる。
どこまでも移動できないように制限をつくる。
1.プレイヤーの前にボックストリガーを作成。
キャラクター(Pawn)だけをブロックして、他は無視する設定にした。
2.プレイヤーの後ろにボックストリガーを設置
Ballに対して[Overlap]にすることで、イベントを追加する。Ballがこのボックスに触れたときゲームオーバーのUIを表示する。
User Interface
コンテンツブラウザの[Maps]フォルダ内で右クリック。[Level]を選択。

名前をつける。
↓

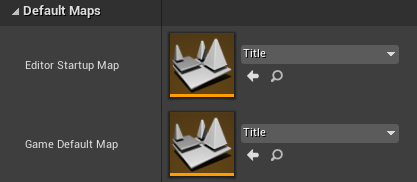
左上のバーから[Edit]>[Project Settings…]
[Project]>[Maps & Modes]>[Default Maps]でタイトルのレベルを設定。
画像やテキストを使って適当につくる。
ゲーム画面に放り込むだけなので、簡単なものなら感覚で出来る。
User Interfaceの略
見た目を良くしたり、操作するための何か。
WB = Widget Blueprint (ウィジェットブループリント)
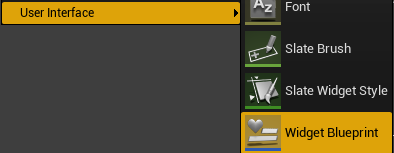
1.[Content Browser]で右クリック。一番下にある[User Interface]から[Widget Blueprint]を選択。
↓
2.好きに名前をつける。
3.ダブルクリックすると編集画面に移る。
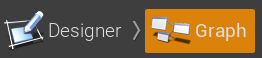
[Designer]と[Graph]の2種類のエディタがある。
(画面右上から変更可能。)
ゲーム画面の見た目を変える
白い枠がゲーム画面である。
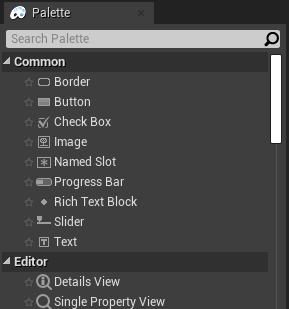
左にある[Palette]パネルからゲーム画面の中にドラッグすることで配置できる。
ノードをつかって指示を出す。

(画面の大きさが変わったときに)位置がずれるのを防ぐもの。
画面右側の[Details]パネルで[Anchors]を選択すると、どこに固定するかを選べる。
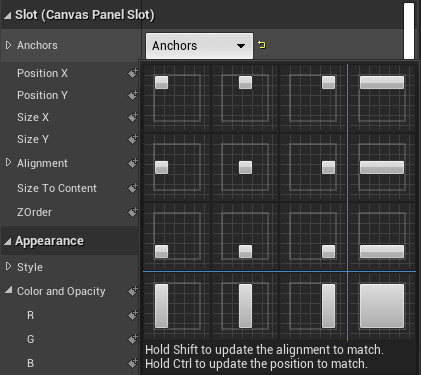
どこに固定しているかは、白い花のようなアイコンでもチェックできる。
(まずは)コンテンツブラウザにドラッグ!
1.コンテンツブラウザに使いたい画像をドラッグして入れる。
【UE4エディタ】

別形式で保存しなおすため、元の画像を消してもUEの中の画像は消えない。
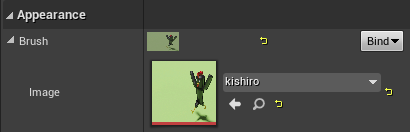
2.ウィジェットBPを開き、画面左の[Palette]パネルから[Image]を選び、ゲーム画面の中にドラッグ。

3.画面右の[Details]パネルの[Appearance]で、コンテンツブラウザに入れた画像を選択。
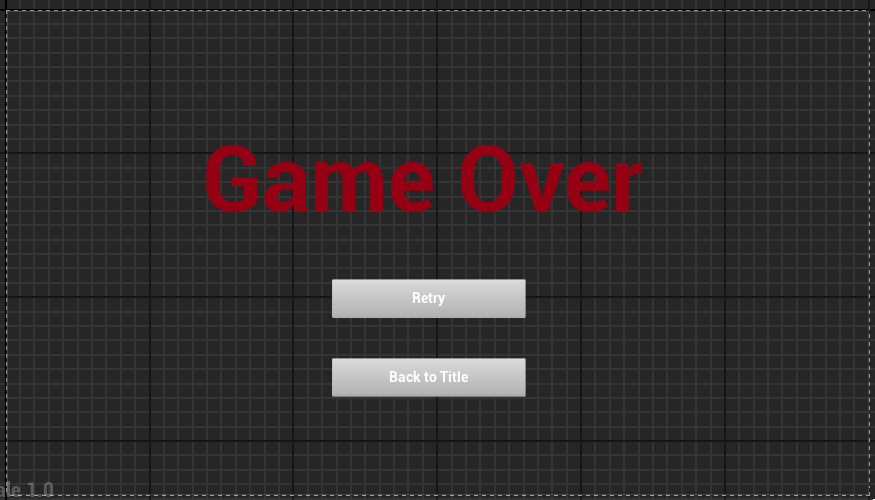
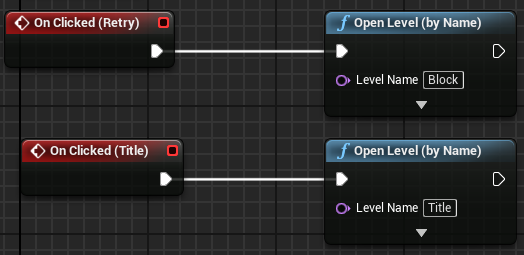
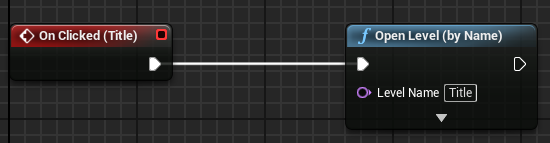
1.画面左上の[Palette]パネルからドラッグしてボタンを作成。

2.画面左下の[Hierarchy]パネルで、作ったボタンを選ぶ。
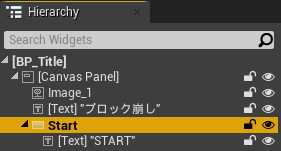
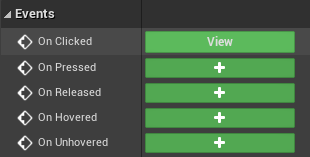
3.画面右の[Details]パネルの[On Clicked]の右の緑色の部分をクリック。
4.下のようなノードを作成。[Open Level]のノードの[Level Name]にゲーム本編のレベルの名前を入力。
こんな感じ。

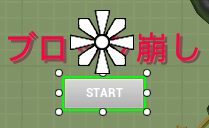
ゲームスタート
1.コンテンツブラウザの[Blueprints]フォルダ内に新しいUIを作成。

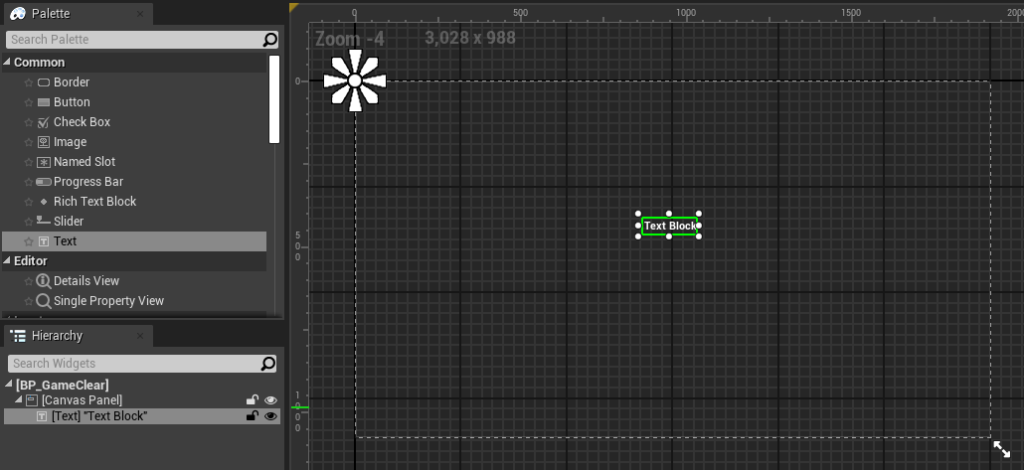
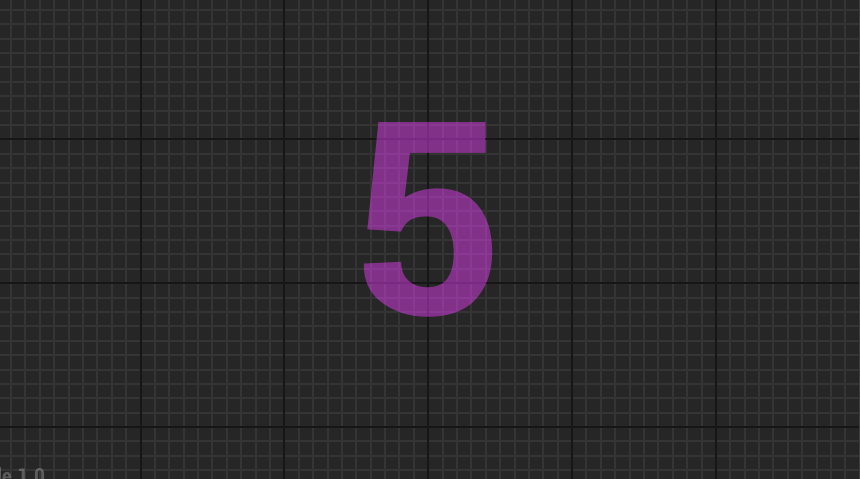
2.数字のテキストを作る。
3.テキストの名前をつけて、右の[Is Variable]に ✓ を入れる。

4.他のBPからテキストを変えるためのBPをつくる。

[Details]パネルでピンを作れる!
1.右クリックで[Add Custom Event…]を選び名前をつける。
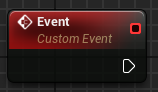
2.作成したカスタムイベントを選択した状態で、[Details]パネルの[Inputs]の右の[ + ]キーをクリック。
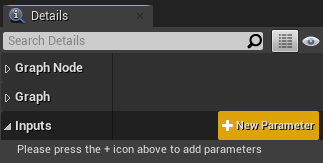
3.名前と変数の型を選ぶ。

これでは上手くいかなかった。他のBPから呼び出して使うのだが、[Delay]で待っている間に先のイベントを実行してしまった。

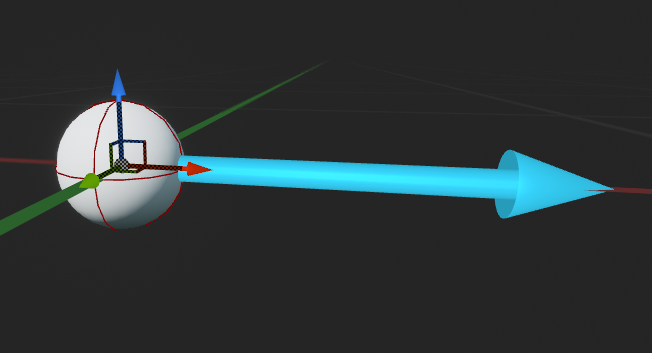
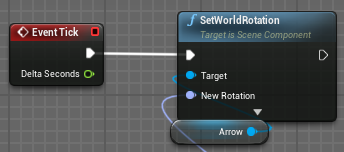
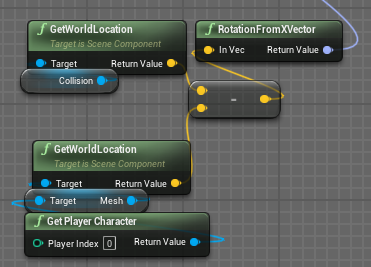
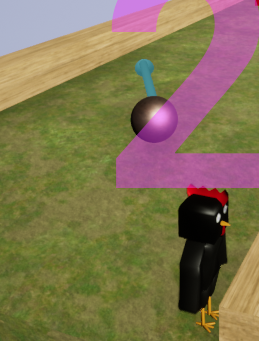
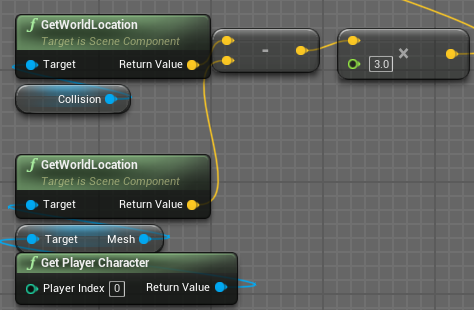
キャラクターからボールへの向きに矢印(Arrow)を向ける。
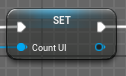
1.カウントダウン用のUIを表示

2.カウントダウン用のUIにアクセスできるようにする。
3.1秒ごとにカウントダウンを進める。
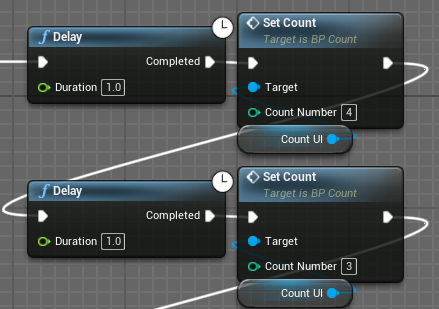
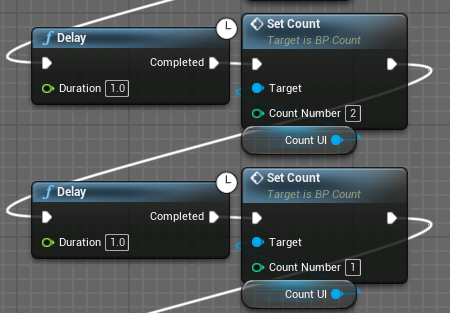
4.カウントダウン用のUIを消す。
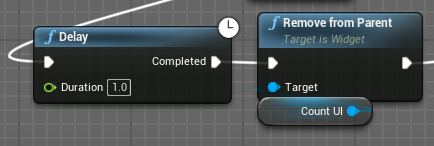
5.Tick(毎フレームの処理)を止めて、UIを非表示。
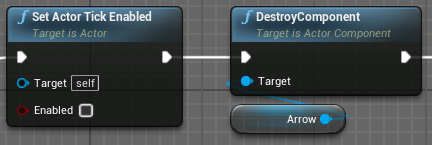
6.発射

(キャラクターとボールの距離に比例する大きさの速度)
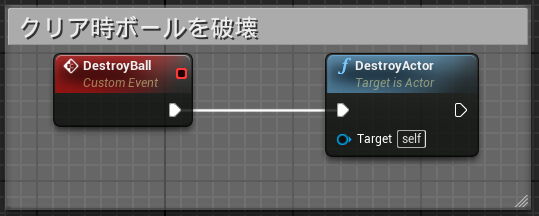
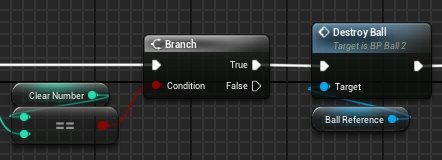
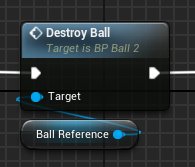
[Destroy Ball]のノードはカスタムイベントでつくる。右クリックして検索ボックス
[Custom Event]と入力したら作れる。
このノードはブロックのBPをトリガーとして実行させる。
ゲームオーバー
一番手前のトリガーにボールがOverlapしたときイベント発生。
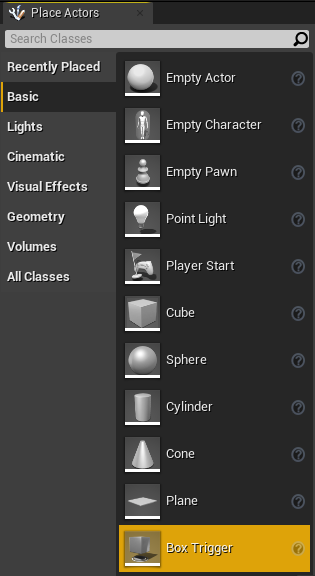
1.[Place Actors]パネルの[Basic]から[Box Trigger]をViewportにドラッグ。
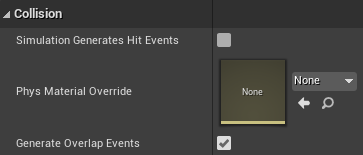
2.[Details]パネルで[Generate Overlap Events]に ✓ を入れる。
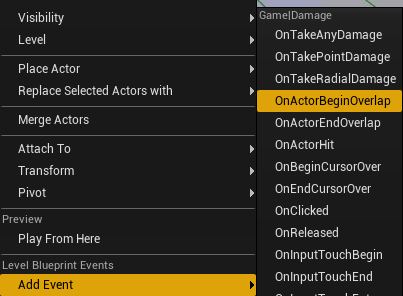
3.ボックストリガーをの上で右クリック。

4.[Add Event]から必要なイベントを選択。
↓
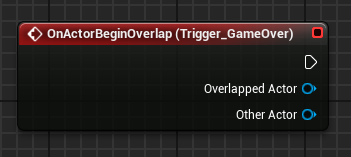
5.望むイベントを作成。
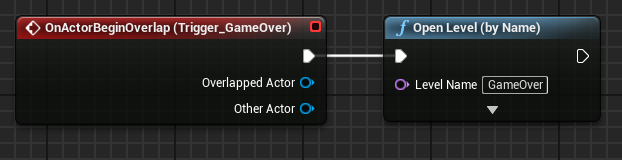
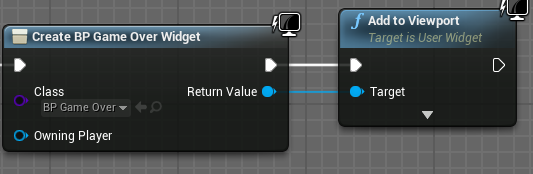
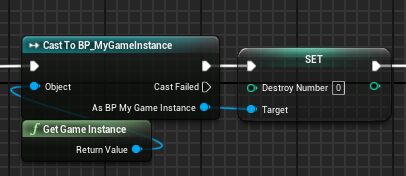
1.Game Instance にアクセス。
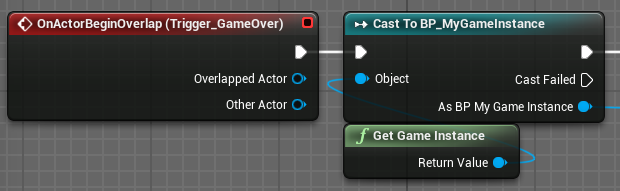
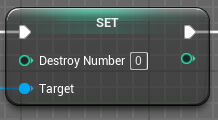
2.[Destroy Number](爆発したブロック数)をリセット。
3.ゲームオーバーのUIを表示
ゲームクリア
Game Instance
データの保存などに使えるBP。
普通のデータはレベルを切り替えるとなくなってしまうが、Game Instance に保存したデータは消えずに残る。
1.コンテンツブラウザで右クリック。[Blueprint Class]を選択。

2.下の検索ボックスで検索して[GameInstance]を選択。
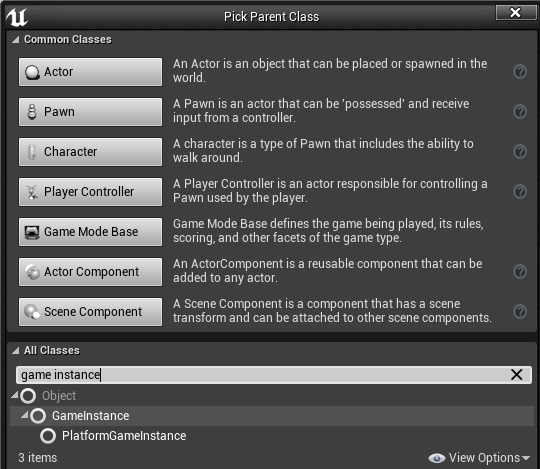
3.名前をつける。
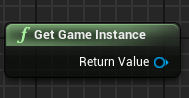
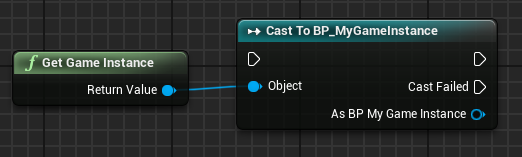
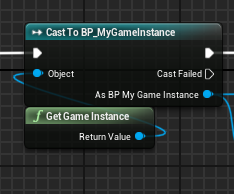
1.Game Instance と情報のやり取りをするには、まず[Get Game Instance]のノードを作成。
2.Game Instance へのアクセス権を得るために、Cast を作成。
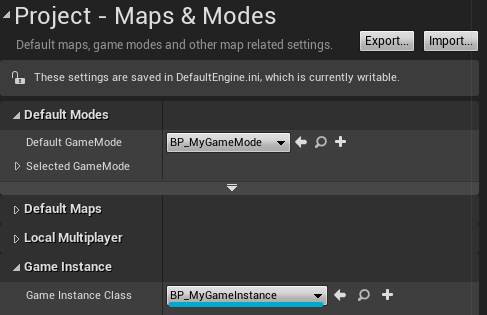
[Edit]から[Project Settings…]をクリック。
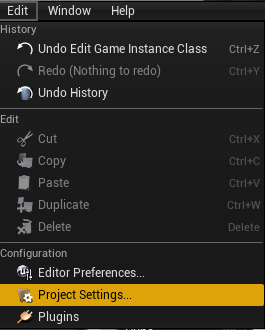
[Project]>[Maps & Modes]から[Game Instance Class]を設定。
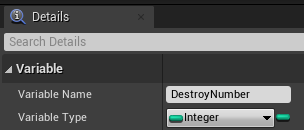
爆発したブロックを数えるのに使う変数を作成。
1.Game Instance をダブルクリックして Event Graph を編集。
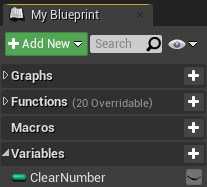
2.画面左の[My Blueprint]パネルにて、[Variables]の右の[ + ]キーを押して新しい変数を作成。
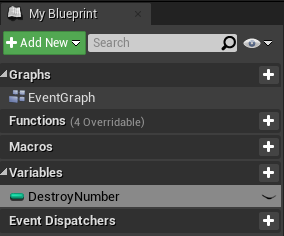
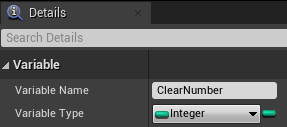
3.画面右の[Details]パネルにて、[Variable Type]を[Integer(整数)]に変更。
ブロックのBP
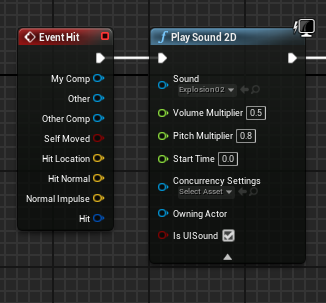
1.ブロックに何か当たったら爆発音を鳴らす。
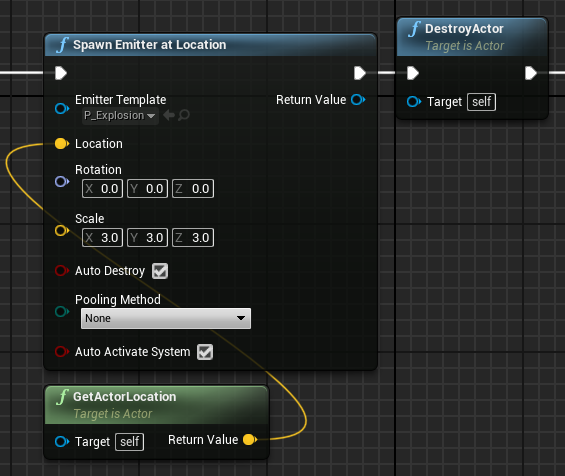
2.ブロックの位置で爆発のエフェクトを出して、ブロックを破壊。
1.Game Instance と情報のやり取り。
2.ブロックが爆発したら[ Destroy Number ]に1を足して、Game Instance に保存。
1.全て爆発したらボールを破壊。
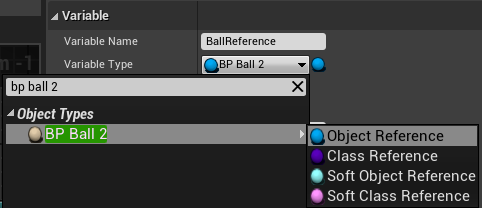
新しく作った変数。画面左下の[My Blueprint]パネルにて、[Variables]の右の[ + ]をクリックすることで作れる。
画面右側の[Details]パネルで編集できる。今回、[Variable Type]を[Integer]、[Default Value]を2した。ブロックを2個配置したので。

情報のやり取りに必要なもの。
Referenceの情報は青い線でつながれる。
他のBPとのReferenceを作るのは少し面倒。
今回は例として、ブロックのBPにボールのBPへのReferenceを作る場合を考える。
1.ブロックのBPの[Event Graph]を開く。

2.画面左下の[My Blueprint]にて、[Variables]の右の[ + ]を押して変数を追加

3.画面右上の[Details]タブにて、変数の名前と[Variable Type]を入力。
(検索ボックスにボールのBP名を入れて探す。)
4.画面左の[My Blueprint]パネルにて、作った変数の右側の目のアイコンをクリックして開く。

↓

5.Viewportに行き、ブロックのアクタを選択。
6.画面右の[Details]パネルにて、Reference としてボールのBPを選択。
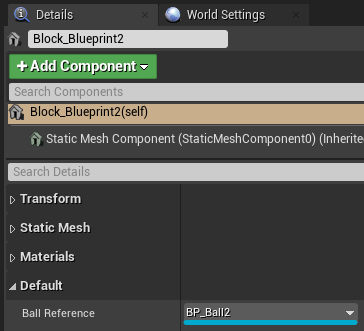
(複数のブロックがある場合は、そちらにも Reference を入力。)
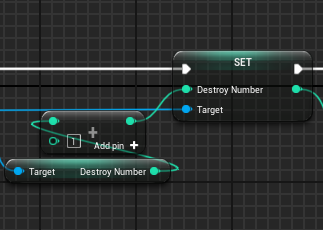
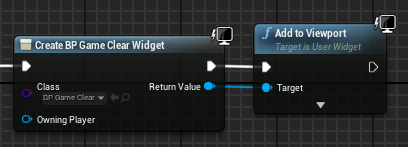
2.[Destroy Number](破壊されたブロック数)をリセット。
3.ゲームクリアのWBを表示。
関連知識
User Interfaceの略
見た目を良くしたり、操作するための何か。
WB = Widget Blueprint
(画面の大きさが変わったときに)位置がずれるのを防ぐもの。
画面右側の[Details]パネルで[Anchors]を選択すると、どこに固定するかを選べる。
どこに固定しているかは、白い花のようなアイコンでもチェックできる。
物体同士が触れたかどうかの判定。また、その判定につかうもの。
「当たる」「入る」「出る」の3種類の判定がある。
それぞれに対してイベントを設定できる。
当たる
入る
出る
[On Component]と[Event Actor]ではとれる情報量(ピンの数)などが違う。
物体同士が当たったときに、
無視する(Ignore)か、重なる(Overlap)か、ぶつかる(Block)かを決めるもの。
例1:プレイヤーの前に置くボックストリガー
キャラクター(Pawn)だけをブロックして、他は無視する設定にした。
例2:プレイヤーの後ろのボックストリガー
Ballに対して[Overlap]にすることで、イベントを追加する。Ballがこのボックスに触れたときゲームオーバーのUIを表示する。
Ignore はイベント作成できない。
Overlap はイベント作成できる。
フィルターの対象
[Pressed]と[Released]の2つの状態のイベントを取得できる。
赤い帽子をかぶった配管工のように、ボタンを押している長さでジャンプ量が変わるようにできる。
【参考】Third Person のテンプレート
押し込み具合によるイベントを取得できる。らしい。
たぶん、強く押し込むほど速く移動したり出来る。
【参考】Third Person のテンプレート
データの保存などに使えるBP。
普通のデータはレベルを切り替えるとなくなってしまうが、Game Instance に保存したデータは消えずに残る。
情報のやり取りに必要なもの。
Referenceの情報は青い線でつながれる。
他のBPとのReferenceを作るのは少し面倒。
関連スキル
WB = Widget Blueprint (ウィジェットブループリント)
1.[Content Browser]で右クリック。一番下にある[User Interface]から[Widget Blueprint]を選択。
↓
2.好きに名前をつける。
3.ダブルクリックすると編集画面に移る。
(まずは)コンテンツブラウザにドラッグ!
1.コンテンツブラウザに使いたい画像をドラッグして入れる。
【UE4エディタ】
別形式で保存しなおすため、元の画像を消してもUEの中の画像は消えない。
2.ウィジェットBPを開き、画面左の[Palette]パネルから[Image]を選び、ゲーム画面の中にドラッグ。
3.画面右の[Details]パネルの[Appearance]で、コンテンツブラウザに入れた画像を選択。
Alt + 矢印をドラッグ
[Edit]>[Project Settings]>[Engine]>[Collision]より、[New Object Channel…]を選択。
名前と[Default Response]を決めて[Accept]。
[Ignore]、[Overlap]、[Block]の三種類。

[Details]パネルでピンを作れる!
1.右クリックで[Add Custom Event…]を選び名前をつける。
2.作成したカスタムイベントを選択した状態で、[Details]パネルの[Inputs]の右の[ + ]キーをクリック。
3.名前と変数の型を選ぶ。
1.コンテンツブラウザで右クリック。[Blueprint Class]を選択。
2.下の検索ボックスで検索して[GameInstance]を選択。
3.名前をつける。
1.Game Instance と情報のやり取りをするには、まず[Get Game Instance]のノードを作成。
2.Game Instance へのアクセス権を得るために、Cast を作成。
1.[Place Actors]パネルの[Basic]から[Box Trigger]をViewportにドラッグ。
2.[Details]パネルで[Generate Overlap Events]に ✓ を入れる。
3.ボックストリガーをの上で右クリック。
4.[Add Event]から必要なイベントを選択。
↓
5.望むイベントを作成。
今回は例として、ブロックのBPにボールのBPへのReferenceを作る場合を考える。
1.ブロックのBPの[Event Graph]を開く。
2.画面左下の[My Blueprint]にて、[Variables]の右の[ + ]を押して変数を追加
3.画面右上の[Details]タブにて、変数の名前と[Variable Type]を入力。
(検索ボックスにボールのBP名を入れて探す。)
4.画面左の[My Blueprint]パネルにて、作った変数の右側の目のアイコンをクリックして開く。
↓
5.Viewportに行き、ブロックのアクタを選択。
6.画面右の[Details]パネルにて、Reference としてボールのBPを選択。
(複数のブロックがある場合は、そちらにも Reference を入力。)
参考動画
猫でもわかるシリーズの続編を期待!
めちゃくちゃ役立つ!
動画が長いから敬遠してたけど、UE初心者は絶対見るべき!
(現在#1~#8まである。続きをやるようなことを#8で言っていたが、1年以上更新されていない。)
Twitterしてます
ブログの更新をお知らせ
コメント